blazar core
Blazar Core 0.3.9 · Early access · Windows and macOS

Less time in menus.
More time for music.

A DAW for film, trailer and media composers that keeps the technical side out of your way. Your Kontakt libraries sit one drag from the arrangement, edits open at the pointer, and the busywork can go to your AI agent while you keep writing.

Windows 10+ macOS 12+VST3 · CLAP · AU · ARA 2

Try it: press play, click the bar ruler to move the playhead, mute and solo tracks, search the browser. The cue and the libraries are made up.

Version0.3.9
PlatformsWin · Mac
PluginsVST3 · CLAP · AU
AudioASIO · Core Audio
Feature tour

Watch Alex walk through it, feature by feature.

Open on YouTube
Made for scoring

Built around how composers work.

Orchestral templates, sample libraries, picture and deadlines: every feature exists because a cue had to get done. Each one is acted out below, in the app’s own pixels.

Writing

From your libraries to the grid, without the detours.

Programs, articulations and edits are where your hands already are.

Drag Kontakt programs into the arrangement

The Programs tab lists every Kontakt instrument in your libraries, found through Native Instruments' list of installed libraries. Add other folders with Folders.

Drag a program onto empty space. Blazar Core creates a Kontakt track, opens Kontakt and loads the program. Drop a program on a track that already has Kontakt, and the program loads there.

The track is named after the program: the library in three capitals, then the patch. A name you typed yourself stays.

Tags find them: click Strings, Brass or a maker such as Spitfire Audio, and only those stay. Plugins carry theirs too (EQ, Dynamics, Limiter, Reverb...), and you add your own.

The Sounds tab does the same for the audio files in the folders you add.

In the manual

Send each articulation once, then drag it where you need it

Click Learn in the instrument’s window and send each switch once: a key switch, a CC value (Spitfire’s UACC) or a program change. Every one becomes a button, named after what the library’s window shows for it: Legato, Spiccato, Tremolo, Pizzicato.

Prism shows what switches each articulation and lets you change it: a key at its own velocity, a CC value, a program, a MIDI channel for libraries with a patch on each channel, or an accent for one note. Blazar Core keeps them with that program for the next time you load it. Expression maps from Cubase, Logic, Studio One, Dorico, REAPER and Cakewalk import in one click.

In the piano roll, drag a button onto the articulation lane below the notes: the notes from there on play with that articulation until the next change. Blazar Core sends the switches during playback.

With notes selected, a click on a button gives them that articulation. Right-click the buttons to open Prism.

In the manual

Hold Q for the edit menu

Hold Q and a circular menu opens at the pointer with what you can do to the selection. Point at a command and release.

An audio clip reverses, normalizes, shifts in pitch, fits to the nearest whole bars or inverts its polarity. A MIDI container quantizes, aligns to the click, humanizes, or bounces to audio on a new track right under it.

With nothing selected, the menu cuts or inserts time between the locators and adds audio tracks, instrument tracks and folders.

Every edit is one undo step.

In the manual

Recorded MIDI that sits where you meant it

What is left after your interface’s latency is your own playing: a little ahead of the click or behind it, drifting slowly over a long take and quickly within a phrase.

Align reads that lean the way a musician would. Note by note, it works out which line of the grid each note was meant for, quarters, eighths, sixteenths or triplets, and puts it there. Unlike quantize, a note that drifted closer to the wrong line still lands on the right one. Chords land flat, and a grace note or a flam keeps its feel.

Turn on Auto and every take is aligned to the click when recording stops, as its own undo step.

Align sits beside Quantize and Humanize in the piano roll, and in the Q menu.

In the manual
Mixing

A console in every channel, and room to hear one thing.

Zoom into a channel, blend effects with one move, or leave one track alone with its sound.

Zoom into a track and its channel

Press Z and the selected track fills most of the arrangement. At the same moment the mixer opens that channel’s strip beside it: filters, EQ, gate, compressor and tape, each with its display and knobs.

The EQ draws the channel’s spectrum under its curve while the music plays. Select another track and the zoom follows; press Z again and everything folds back.

Every channel has the strip built in, after its inserts and before its fader, like a console. Each module stays off until you turn it on.

In the manual
Drag the orb. Double-click the pad to center it.

Blend four effects with one orb

Every channel has a Morph field between insert 4 and insert 5. Load up to four effects into its slots and drag the orb across the pad. Two effects sit on a line, three on a triangle, four on a square.

The shares always add up to 100%, so the level holds while you move. All four effects keep running, and a reverb tail never cuts off halfway.

Press Write and move the orb while the music plays. Blazar Core records the path and plays the movement back.

Load one plugin into all four slots with different settings, and the orb morphs between its presets.

In the manual

Work on one track and nothing else

The Event Horizon button on a track header shows that track on its own. The arrangement shows only that track, enlarged, with specks of light drifting above and below it. The mixer shows only its channel, zoomed, with its fader and modules.

Every control stays as it is, and nothing in the mix changes. Click the button again and all tracks return at their previous height.

On a folder, Event Horizon keeps the folder and its tracks. Press Esc to show everything again.

In the manual
Built-in effects

Effects that know what the arrangement is about to play.

They read the notes, the tempo and the key straight from the session: nothing to route, nothing guessed.

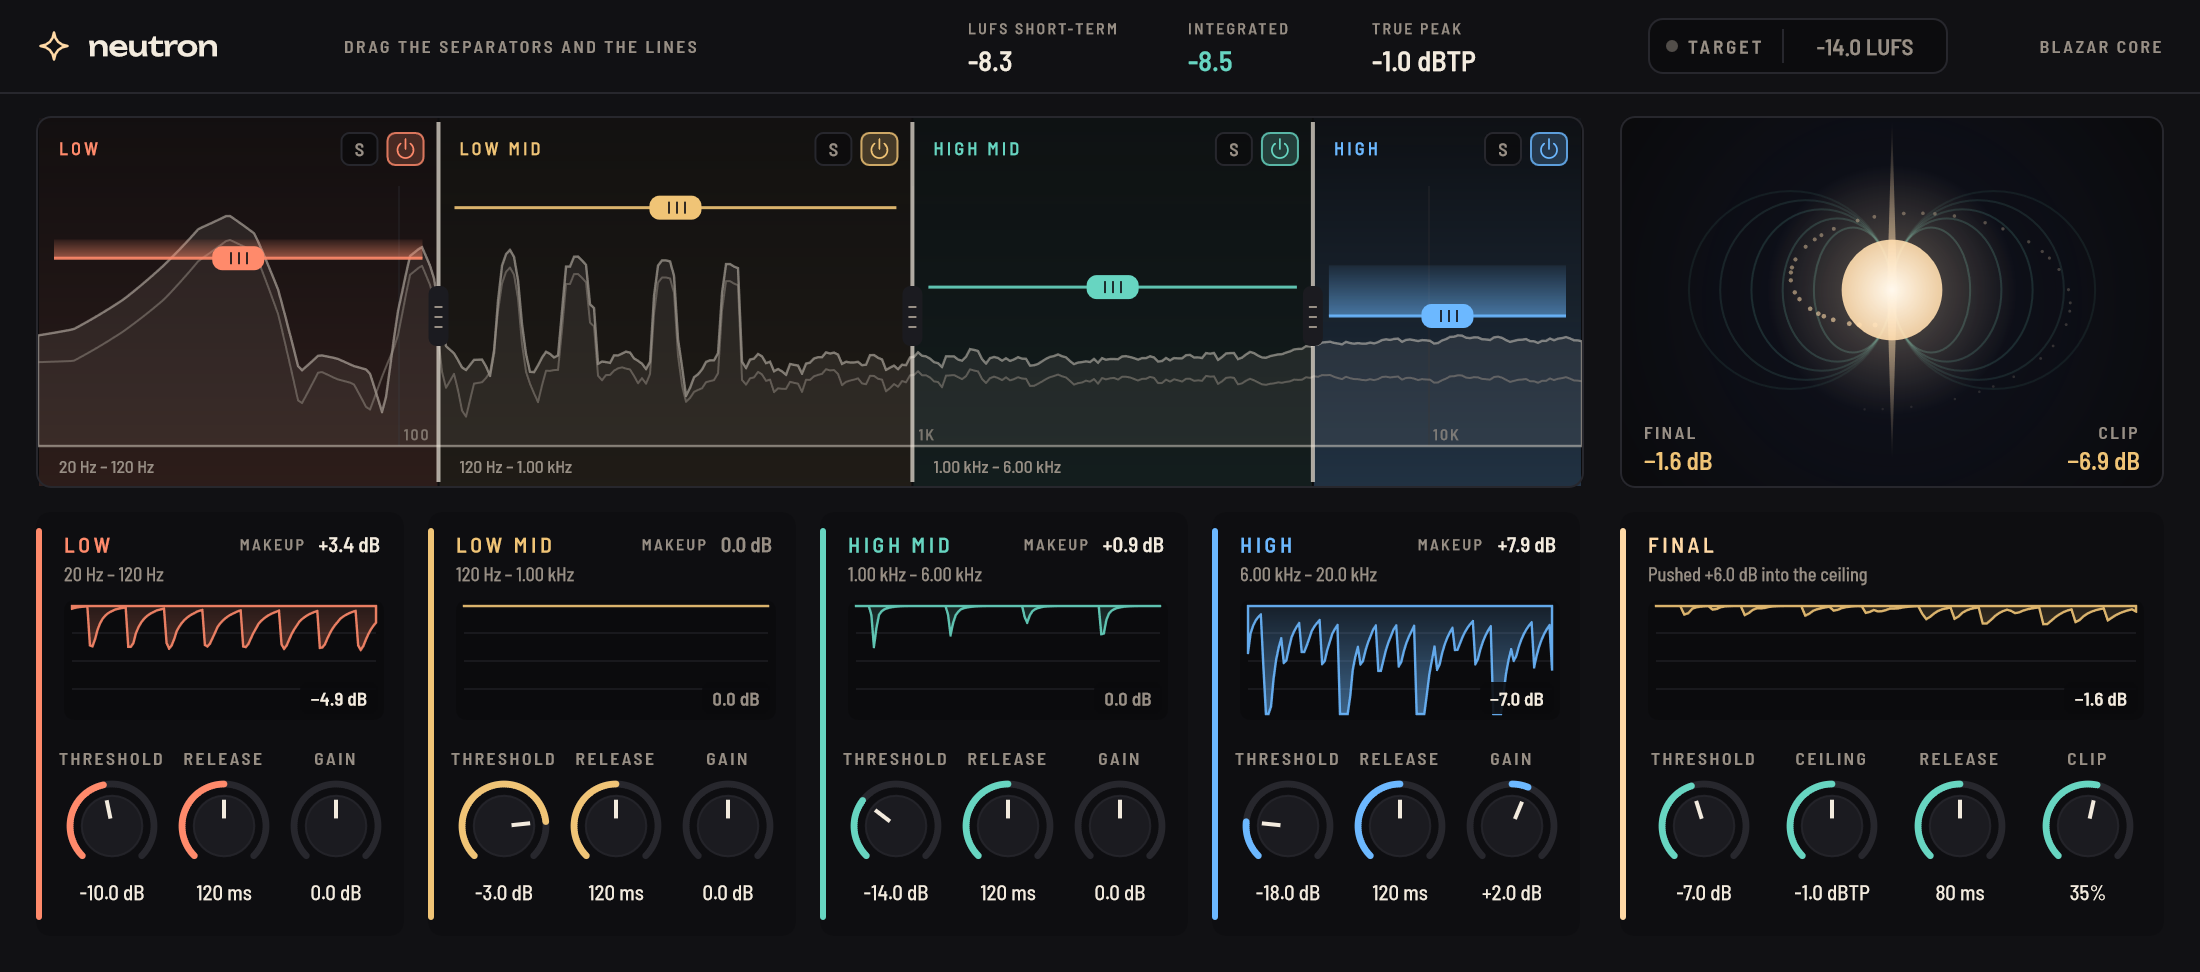
Finish a track with one knob

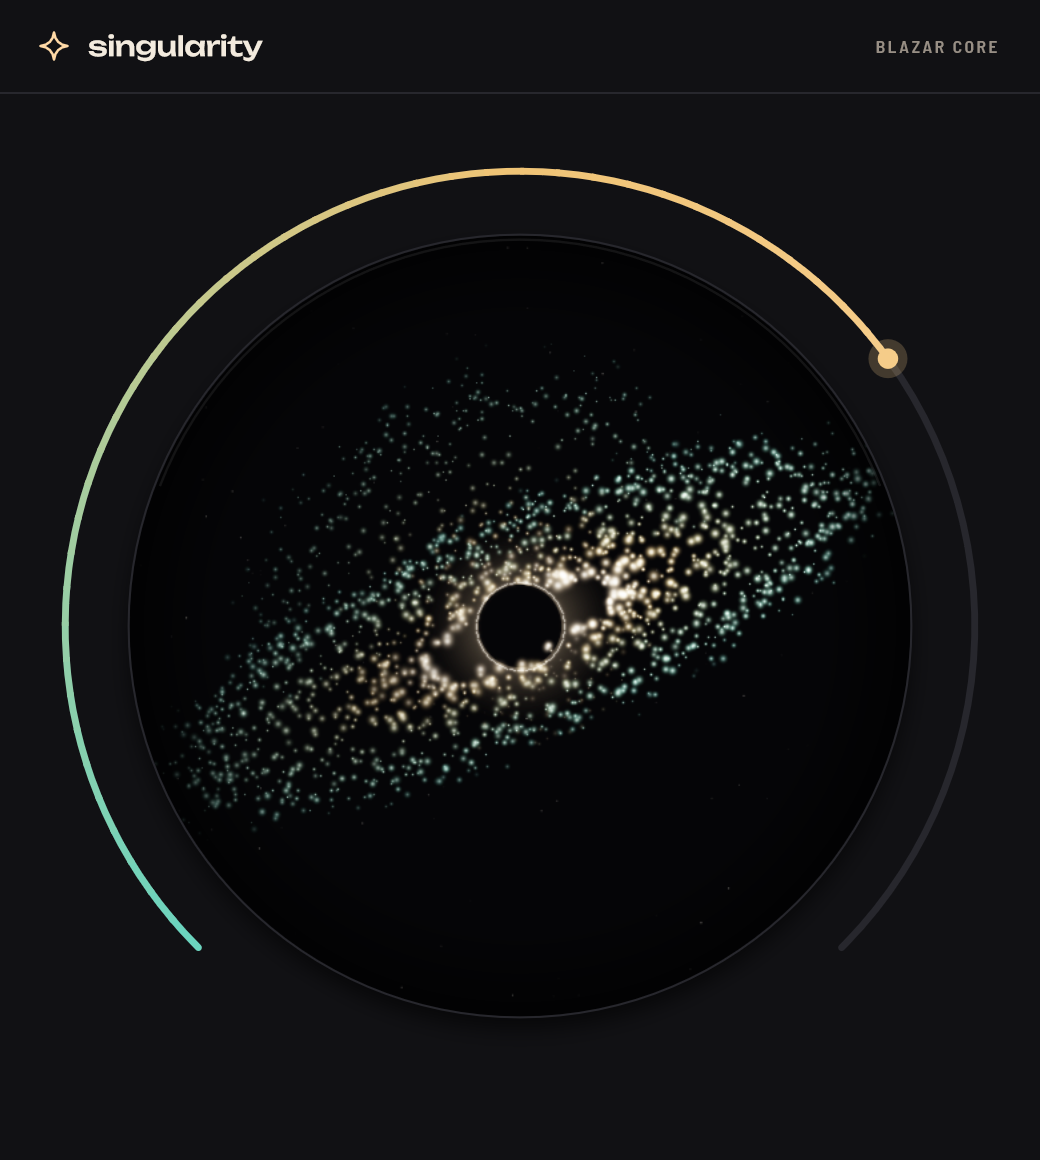
Singularity pulls a whole finishing chain into one knob. Turn it up and the track gets gentle glue compression, lows lifted, steadied and made mono below 100 Hz, cleared low mids, eased build-ups and harshness, silky highs with air on top and a wider top end.

Then a touch of tape and a soft clipper push the body up while the peaks stay where they came in. The track sounds louder and denser, not simply turned up.

There is nothing to set for the material: Singularity follows the sound’s own level, so a quiet flute and a loud drum bus get the same care. At 0% it is neutral.

The black hole of the Blazar Core mark comes alive as you turn it, and near the top of the range the jet fires.

In the manual
Turn on Bypass to see the strings cover the horns.

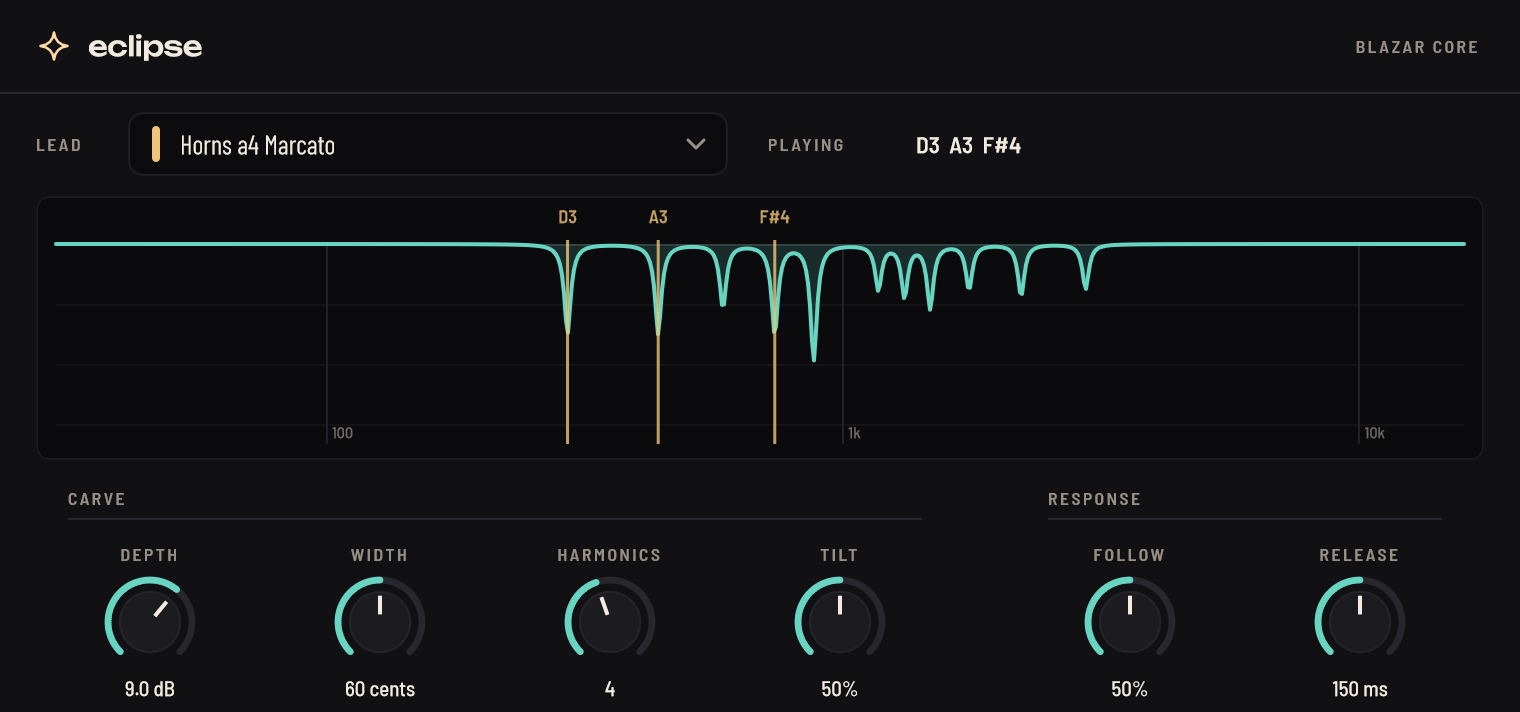
Make room for the lead

Eclipse goes on a bed, such as a string pad or a choir, and follows the lead you pick from its list. Whenever the lead plays, Eclipse cuts the exact notes it holds, and their harmonics, out of the bed. The cuts last only while those notes sound.

The horn line stays clear over thick strings, and the strings keep everything else. Eclipse reads the lead’s notes straight from Blazar Core: there is no sidechain to route.

Depth, Width and Harmonics set how deep and how wide the cuts go. Release sets how long the room stays after a note.

In the manual

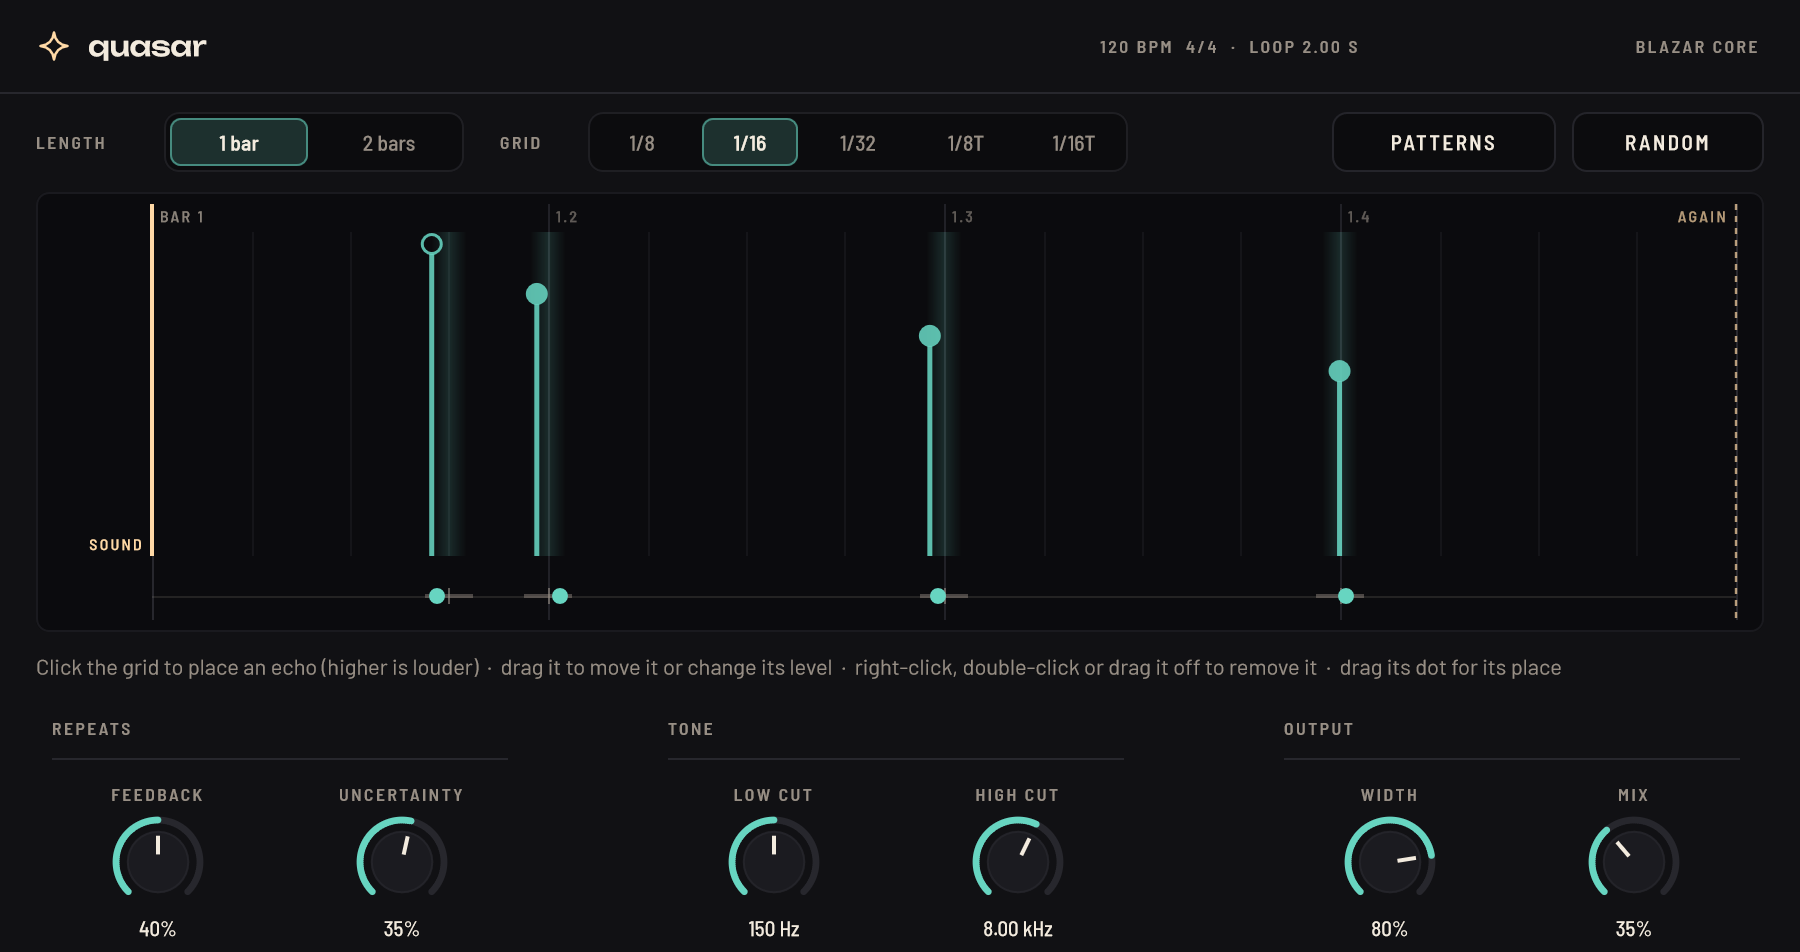
A delay that plays the rhythm you draw

Quasar’s echoes follow a rhythm you build, instead of one note value. Click the grid and an echo appears on the nearest step, as loud as your click is high. Drag it to move it or change its level, and drag the dot beneath it to place it in the stereo field.

The rhythm runs over one or two bars at the song’s tempo and plays again, quieter by Feedback. Turn up Uncertainty and the echoes drift off their places and now and then skip a pass, so no two loops are quite alike.

Patterns has starting points, from dotted eighths and tresillo to Bo Diddley and a two-bar spiral, and Random rolls a new rhythm.

In the manual
Picture and agents

Score to picture. Hand off the busywork.

The picture keeps out of your way, and an agent does the clicking while you write.

A picture window that gets out of your way

Drop a video on the arrangement and its picture opens in its own window, showing the frame at the playhead with the timecode and bar under it. Put the window on a second screen and it opens there next time.

On one screen, when the pointer heads onto the picture, the window glides off to the corner of Blazar Core furthest from the pointer. Head for Save in the top left and the picture moves to the bottom right.

Its title bar and edges still move and size it, and right after you move it, it stays put.

Frames are exact, and picture and sound line up to the sample.

In the manual

Tell your agent what to do. Keep writing.

Press Ctrl+Space and Jet, the agent inside Blazar Core, rises above the transport. Or connect your own, Claude Code, Codex, Gemini CLI or Claude Desktop, from the agents button at the bottom right.

The agent reads the whole session: tracks, plugins, containers, notes, tempo changes and hit points. Changes land in the open session while you watch, and each one is a single undo step.

  • “Double the cello line an octave up on a new track.”
  • “Put a limiter on the master.”
  • “Cut bars 17 to 20.”
  • “Export the stems.”

Jet runs on Claude Code, Codex or Gemini CLI if you have one, or on an API key you paste in.

In the manual
Under the hood

Big templates, steady playback.

Every core works, spikes are absorbed, and the tracks you are not touching give their memory back.

Playback that rides out CPU spikes

While the song plays, Slipstream renders the tracks that are only playing back a little ahead of the audio device, on CPU threads of their own. When a plugin spikes, that time ahead absorbs the spike, instead of the spike reaching your speakers as a dropout.

Tracks you play, record or monitor, and any track whose plugin window is open, stay in real time, so a knob you turn is heard at once. Faders, pan, mute, solo, sends and volume automation stay live on every track.

How far ahead adapts by itself: deeper after a close call, back again when things are calm.

In the manual

Put the tracks you’re not using to sleep

Blazar Core notices instrument tracks you have left alone for ten minutes. A snowflake button appears in the top bar and gently pulses, offering to put them to sleep.

A sleeping track plays exactly as before from a recorded copy of its sound, while its instrument is unloaded and its effects pause. Their memory and processor time go to the tracks you’re working on.

Select a sleeping track and it wakes by itself, with its instrument loaded again as it was.

Blazar Core only ever offers. Nothing freezes by itself while you render, mix or open an effect.

In the manual
Every day

Comfortable for long sessions.

A look for day and night, and an honest count of where the hours went.

Dark or Daylight, at the click of a button

The sun button at the bottom right switches all of Blazar Core to Daylight, warm paper and ink, at once. The moon button switches back to Dark.

In Daylight, track colors, timecode and hit points take deeper shades so they still read on the light ground. Blazar Core keeps your choice for the next launch.

In the manual

See where your time went

Aevum, built into Blazar Core, keeps track of the time you spend on each session. There is nothing to start or stop.

It sorts the time by what you actually do: composing, arranging, recording, choosing sounds, sound design, mixing, mastering and listening back. Only time with your hands on the keys, the mouse or a MIDI keyboard counts.

See the total for the session, each day’s sittings, and the time per channel and per bar of the song.

The time is kept in the project folder and written every half minute, whether or not you save.

In the manual
Also in Blazar Core 0.3.9

And the things a DAW for deadlines needs.

Count-in

One or two bars before a take, from a standstill. Notes played into it are kept as a pickup.

Bar starts, caught

A click on the ruler lands on the bar’s start, and with the magnet on the playhead follows the grid everywhere.

Hit points and timecode

A hit lane above the bars holds the moments in the picture. The transport counts down to the next one.

Loop recording and comping

Every pass becomes a take. Click the best part of each, and the parts play as one comp.

Melodyne in the arrangement

ARA 2 plugins play the track’s clips themselves and follow every move, cut and undo.

Patch delays, measured

How late each Kontakt patch plays is measured once, silently, and made up for on its track.

Stems with their reverb

The mixdown and any stems in one pass, each with its own share of the send and return effects.

Projects from other DAWs

Open a DAWproject from Bitwig, Studio One or Cubase: its tracks and folders, notes, audio, sends and VST3 plugins come in.

Templates and track presets

Save a track with its instrument, effects and mixer settings, or a whole setup as a template.

Versions and autosave

Ctrl+Alt+S saves the next numbered version. Autosave keeps the 10 newest copies.

Automation

Touch, Latch and Write for the fader and any plugin control. The Morph orb records its path too.

A touch surface

On a touch screen: keys, wheels, articulations and every shortcut as a pad, without ever taking focus.

Latency compensation

Tracks, folder buses, sends and master inserts all meet in time, in playback and in exports.

One hall for the orchestra

Stage seats every section in one stereo concert hall. Each stem keeps its own hall tail.

One instrument, many tracks

MIDI tracks share one Kontakt instance, each on its own MIDI channel and stereo return, with its own Prism map.

The selected track, at the left

The inspector holds the selected track’s routing, inserts, sends and fader, with the mixer closed.

See where each channel plays

An arrow under each channel’s name, and the selected channel’s path through its folders outlined up to the master.

Outboard gear and hardware synths

Hardware effects in insert slots and external instruments on tracks, their round trip measured and made up for.

Updates from inside the app

A new version downloads while you work, installs, and opens your session again.

CLAP plugins

CLAP instruments and effects load beside VST3. A plugin that comes in both is listed once, as the one you choose.
The free trial

Everything works for 30 days of use.

Try your libraries, your template, your workflow, and keep what you make: saving never stops. When you are ready, buy a key and enter it in the app. Nothing to reinstall.