blazar core
Blazar Core 0.5.7 · Early access · Windows and macOS

Less time in menus.
More time for music.

A DAW for film, trailer and media composers that keeps the technical side out of your way. Your Kontakt libraries sit one drag from the arrangement, edits open at the pointer, and the busywork can go to your AI agent while you keep writing.

Windows 10+ macOS 12+VST3 · CLAP · AU · ARA 2

Try it: press play, click the bar ruler to move the playhead, mute and solo tracks, search the browser. The cue and the libraries are made up.

Version0.5.7
PlatformsWin · Mac
PluginsVST3 · CLAP · AU
AudioASIO · Core Audio
Feature tour

Watch Alex walk through it, feature by feature.

Open on YouTube
Made for scoring

Built around how composers work.

Orchestral templates, sample libraries, picture and deadlines: every feature exists because a cue had to get done. Each one is acted out below, in the app’s own pixels.

Writing

From your libraries to the grid, without the detours.

Programs, articulations and edits are where your hands already are.

Drag Kontakt programs into the arrangement

The Programs tab lists every Kontakt instrument in your libraries, found through Native Instruments' list of installed libraries. Add other folders with Folders.

Drag a program onto empty space. Blazar Core creates a Kontakt track, opens Kontakt and loads the program. Drop a program on a track that already has Kontakt, and the program loads there.

The track is named after the program: the library in three capitals, then the patch. A name you typed yourself stays.

Tags find them: click Strings, Brass or a maker such as Spitfire Audio, and only those stay. Plugins carry theirs too (EQ, Dynamics, Limiter, Reverb...), and you add your own.

The Sounds tab does the same for the audio files in the folders you add.

In the manual

Send each articulation once, then drag it where you need it

Click Learn in the instrument’s window and send each switch once: a key switch, a CC value (Spitfire’s UACC) or a program change. Every one becomes a button, named after what the library’s window shows for it: Legato, Spiccato, Tremolo, Pizzicato.

Prism shows what switches each articulation and lets you change it: a key at its own velocity, a CC value, a program, a MIDI channel for libraries with a patch on each channel, or an accent for one note. Blazar Core keeps them with that program for the next time you load it. Expression maps from Cubase, Logic, Studio One, Dorico, REAPER and Cakewalk import in one click.

In the piano roll, drag a button onto the articulation lane below the notes: the notes from there on play with that articulation until the next change. Blazar Core sends the switches during playback.

With notes selected, a click on a button gives them that articulation. Right-click the buttons to open Prism.

In the manual

Select notes by what they are

Select Notes, at the top of the piano roll’s Select & Quantize panel, chooses notes by their pitch, velocity and length, and by where they start in the bar. Drag a grip, and the notes that match are selected as you drag.

Drag the lit span between the grips to move the whole range: from the accents to the softer notes, or from sixteenths to quarters, in one move. Click the steps of a bar to keep only the notes that start there.

New selects only what matches, Add adds it to the selection, and Within keeps the selected notes that match.

Ctrl+Shift+A opens Select Notes. Double-click a range to open it all the way again.

In the manual

Articulate a whole part at a click

Articulate, in the same panel, gives your notes articulations from what they are. The short notes get one, the long ones another, and the accents a third, over their short or long one. Point at it, and the notes show what they would get.

Set how long a short note may be, up to an eighth by default, and how loud an accent is. Apply gives every note its articulation in one edit, and the articulation lane fills in.

With notes selected, a click on an articulation in the Selected row gives it to them at once. Short, Long and Accents select those notes for you.

Ask Jet: “Make the short notes in the violins spiccato.” It selects and edits notes the same way.

In the manual

Hold Q for the edit menu

Hold Q and a circular menu opens at the pointer with what you can do to the selection. Point at a command and release.

An audio clip reverses, normalizes, shifts in pitch, fits to the nearest whole bars or inverts its polarity. A MIDI container quantizes, aligns to the click, humanizes, or bounces to audio on a new track right under it.

With nothing selected, the menu cuts or inserts time between the locators and adds audio tracks, instrument tracks and folders.

Every edit is one undo step.

In the manual

Recorded MIDI that sits where you meant it

What is left after your interface’s latency is your own playing: a little ahead of the click or behind it, drifting slowly over a long take and quickly within a phrase.

Align reads that lean the way a musician would. Note by note, it works out which line of the grid each note was meant for, quarters, eighths, sixteenths or triplets, and puts it there. Unlike quantize, a note that drifted closer to the wrong line still lands on the right one. Chords land flat, and a grace note or a flam keeps its feel.

Turn on Auto and every take is aligned to the click when recording stops, as its own undo step.

Align sits beside Quantize and Humanize in the piano roll, and in the Q menu.

In the manual

Write the harmony on a guide track

Polaris is the session’s guide track. Play the chords in, draw them, or type a symbol such as F/A or Bbmaj7, and Blazar Core voices it from the chord before. The chord names sit under the ruler in every piano roll, so the harmony stays in view while you write on any track.

Stuck on the next chord? Click one, and the Kepler Chord Map opens on it: every chord that could follow as a star, the six best in gold, each with its number in the key and why it works. Choose Epic, Heroic, Dark, Emotional, Modal or Classical to change them. Shift+click a later chord for chords to put between the two.

Select a melody and click Arrange. Brass Arrangement writes close harmony under it from your chords, and Choir Arrangement adds alto, tenor and bass, each in its singers’ range.

The piano roll shows the key Polaris hears as a scale. Snap Notes to the Scale keeps a line in key.

In the manual
Mixing

A console in every channel, and room to hear one thing.

Zoom into a channel, blend effects with one move, or leave one track alone with its sound.

Zoom into a track and its channel

Press Z and the selected track fills most of the arrangement. At the same moment the mixer opens that channel’s strip beside it: filters, EQ, gate, compressor and tape, each with its display and knobs.

The EQ draws the channel’s spectrum under its curve while the music plays. Select another track and the zoom follows; press Z again and everything folds back.

Every channel has the strip built in, after its inserts and before its fader, like a console. Each module stays off until you turn it on.

In the manual
Drag the orb. Double-click the pad to center it.

Blend four effects with one orb

Every channel has a Morph slot between insert 4 and insert 5. Load up to four effects into it and drag the orb across the pad. Two effects sit on a line, three on a triangle, four on a square.

The shares always add up to 100%, so the level holds while you move. All four effects keep running, and a reverb tail never cuts off halfway.

Press Write and move the orb while the music plays. Blazar Core records the path and plays the movement back.

Load one plugin into all four slots with different settings, and the orb morphs between its presets.

In the manual

Move many controls with one macro

A Quantum Entanglement track holds modulation: macros, an XY pad, LFOs, envelopes that a track’s notes start, and followers that follow a track’s level. Link each to what it should move: a fader, a pan, a send, a Morph orb, or any control in a plugin’s window.

One macro can move many controls at once, each through its own range and curve. Turn it up, and the strings’ volume, their send to the hall and a delay’s mix rise together.

Click Entangle on an LFO, an envelope or a follower, then click a macro, and it moves that macro and everything the macro moves. Everything follows the song’s position, so playback, loops and exports always sound the same.

Put a macro on a knob of your MIDI controller, and its lane records what you play. Save a rig to use it in any session.

In the manual

Work on one track and nothing else

The Event Horizon button on a track header shows that track on its own. The arrangement shows only that track, enlarged, with specks of light drifting above and below it. The mixer shows only its channel, zoomed, with its fader and modules.

Every control stays as it is, and nothing in the mix changes. Click the button again and all tracks return at their previous height.

On a folder, Event Horizon keeps the folder and its tracks. Press Esc to show everything again.

In the manual
Built-in effects

Effects that know what the arrangement is about to play.

They read the notes, the tempo and the key straight from the session: nothing to route, nothing guessed.

Finish a track with one knob

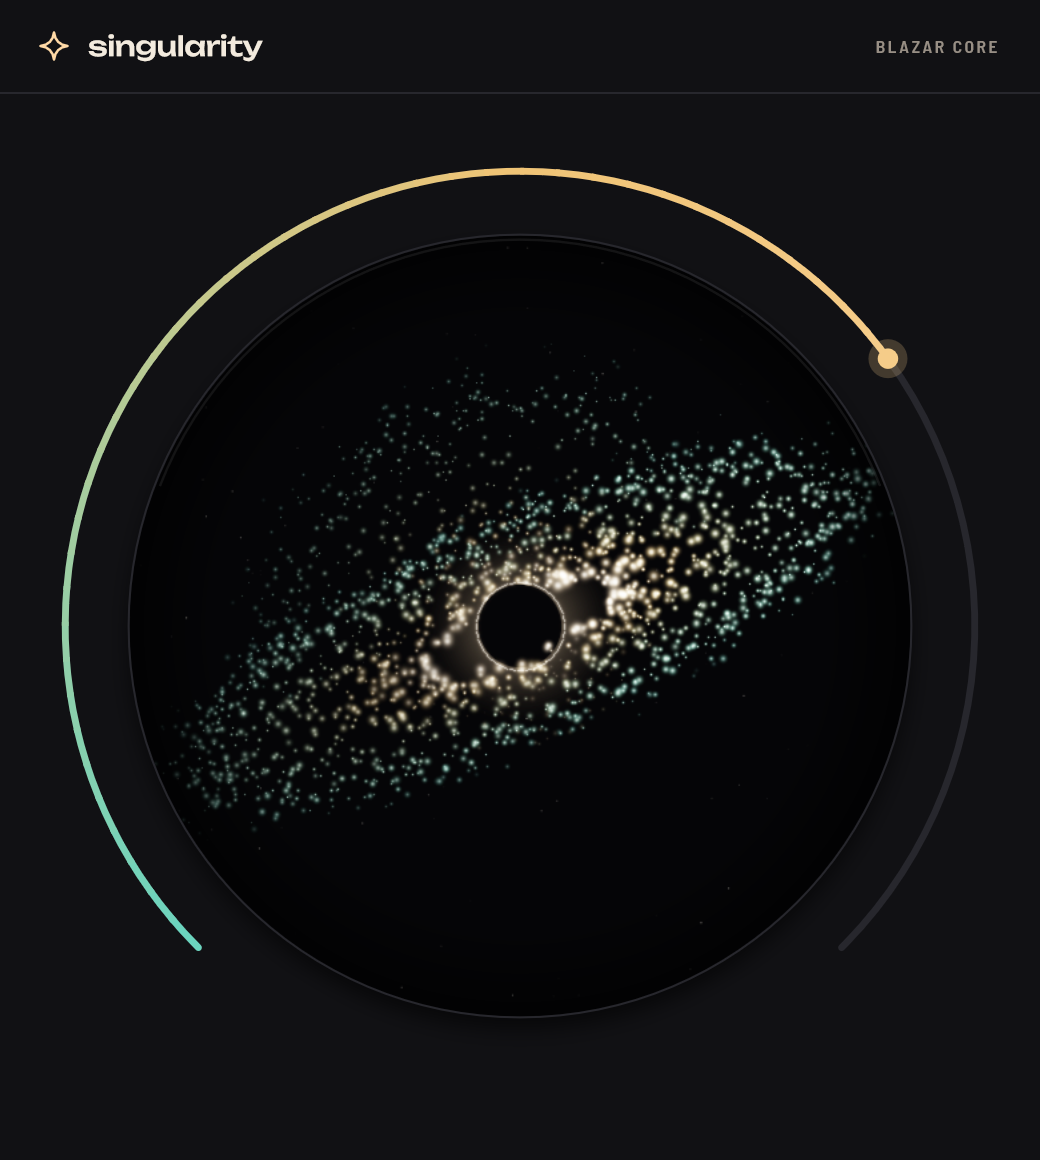
Singularity pulls a whole finishing chain into one knob. Turn it up and the track gets gentle glue compression, lows lifted, steadied and made mono below 100 Hz, cleared low mids, eased build-ups and harshness, silky highs with air on top and a wider top end.

Then a touch of tape and a soft clipper push the body up while the peaks stay where they came in. The track sounds louder and denser, not simply turned up.

There is nothing to set for the material: Singularity follows the sound’s own level, so a quiet flute and a loud drum bus get the same care. At 0% it is neutral.

The black hole of the Blazar Core mark comes alive as you turn it, and near the top of the range the jet fires.

In the manual

Master trailer music on one screen

Zenith is a mastering suite made for trailer music. Put it on the melodic bus, the percussion bus and the master, and each Zenith knows where it sits and hears the others.

Every stage is on screen at once, in the order the sound goes through them: Shape, Clip, Tame, Glue, Density, Width, the Multiband Limiter, Inflate and the Final Limiter. Each picture shows what its stage does as the music plays, and you drag its handles right there.

Set the loudness you want and click Listen. Every Zenith listens together, sets its stages and fine-tunes until the master gets there. Delivery checks what comes out against a trailer, streaming, EBU R128 or ATSC A/85, punch included.

The sky at the right is your loudness. The sound is the sun, rising toward the zenith as it gets louder.

In the manual
Turn on Bypass to see the strings cover the horns.

Make room for the lead

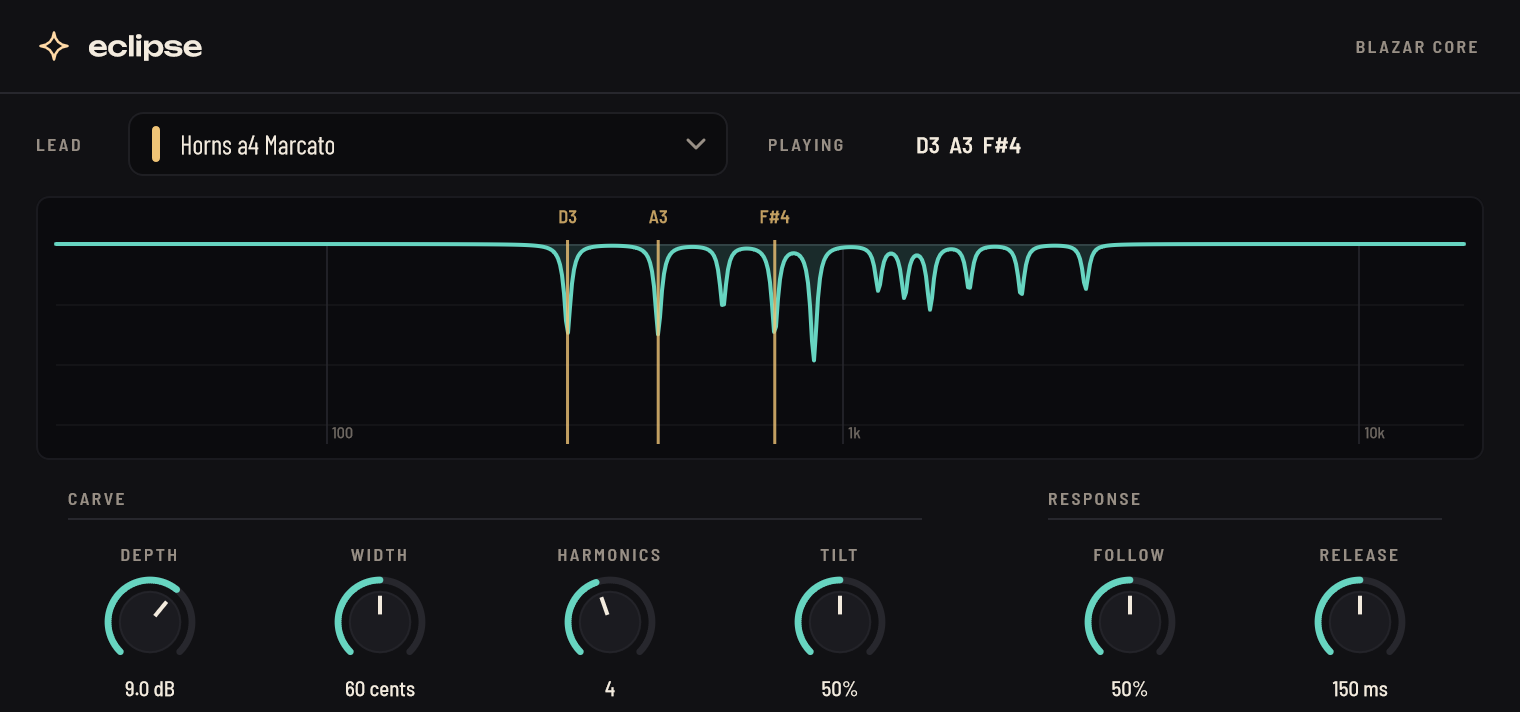
Eclipse goes on a bed, such as a string pad or a choir, and follows the lead you pick from its list. Whenever the lead plays, Eclipse cuts the exact notes it holds, and their harmonics, out of the bed. The cuts last only while those notes sound.

The horn line stays clear over thick strings, and the strings keep everything else. Eclipse reads the lead’s notes straight from Blazar Core: there is no sidechain to route.

Depth, Width and Harmonics set how deep and how wide the cuts go. Release sets how long the room stays after a note.

In the manual

A delay that plays the rhythm you draw

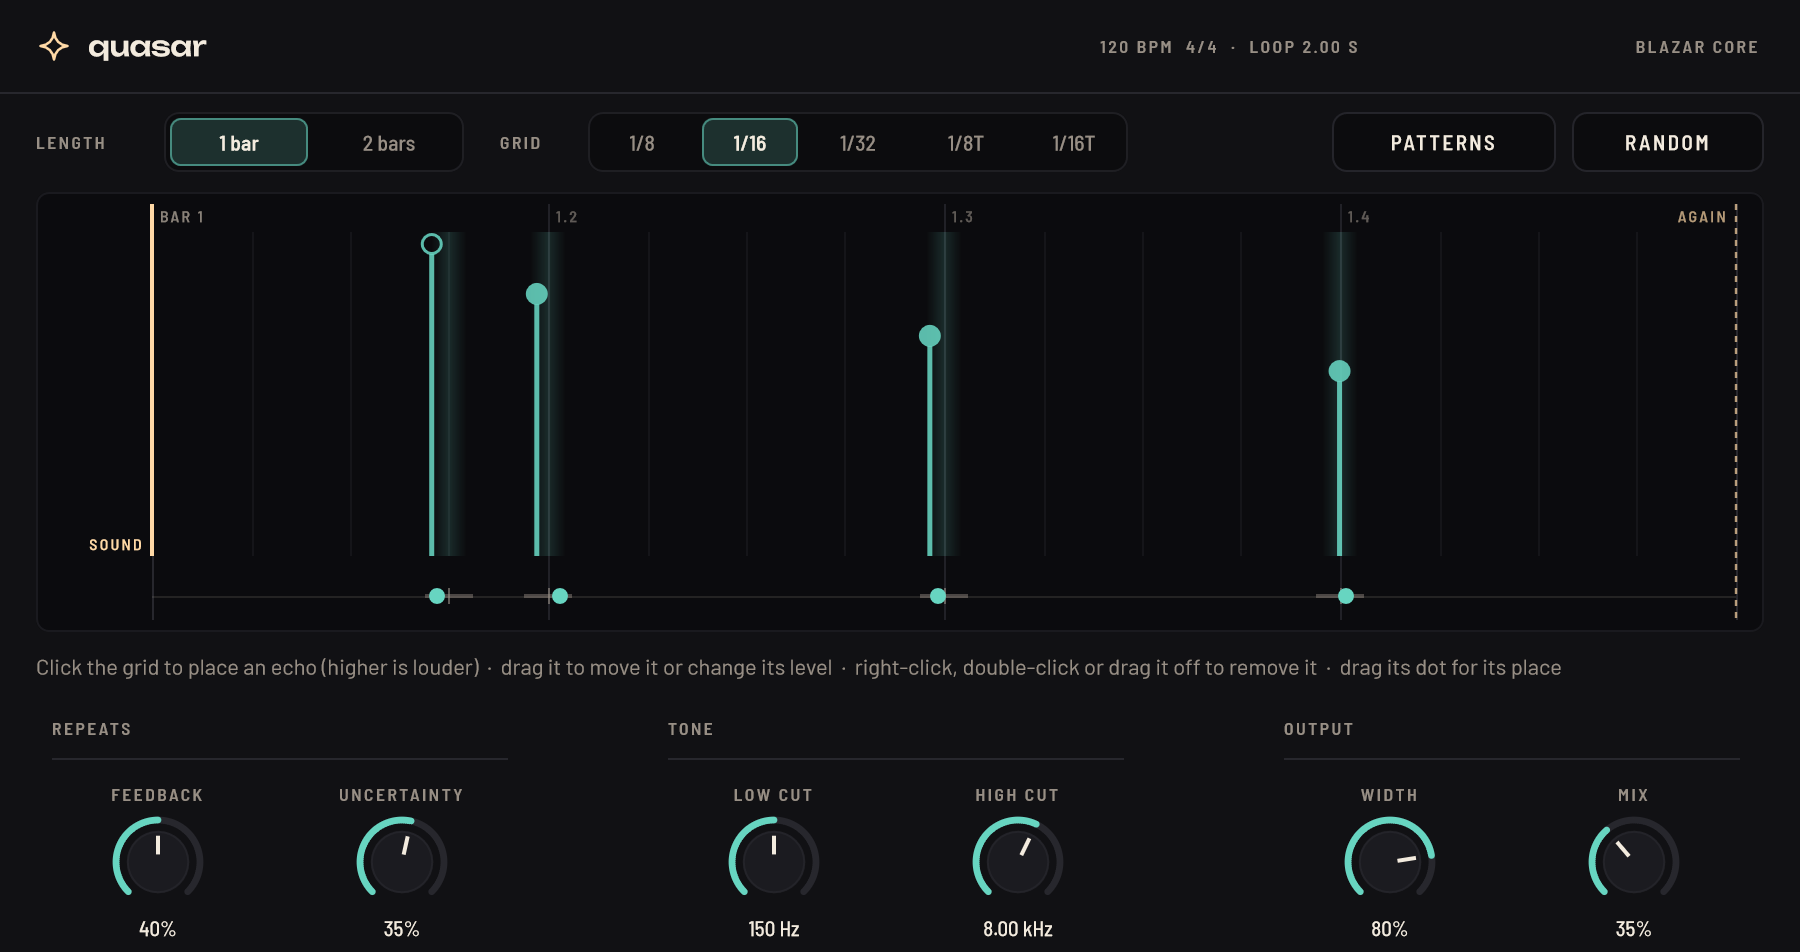
Quasar’s echoes follow a rhythm you build, instead of one note value. Click the grid and an echo appears on the nearest step, as loud as your click is high. Drag it to move it or change its level, and drag the dot beneath it to place it in the stereo field.

The rhythm runs over one or two bars at the song’s tempo and plays again, quieter by Feedback. Turn up Uncertainty and the echoes drift off their places and now and then skip a pass, so no two loops are quite alike.

Patterns has starting points, from dotted eighths and tresillo to Bo Diddley and a two-bar spiral, and Random rolls a new rhythm.

In the manual

Every effect, as it looks in Blazar Core

Read about each
Singularity’s window

Singularity

The one-knob finisher: glue, weight, clarity, silk and air in proportion.

Gamma Burst’s window

Gamma Burst

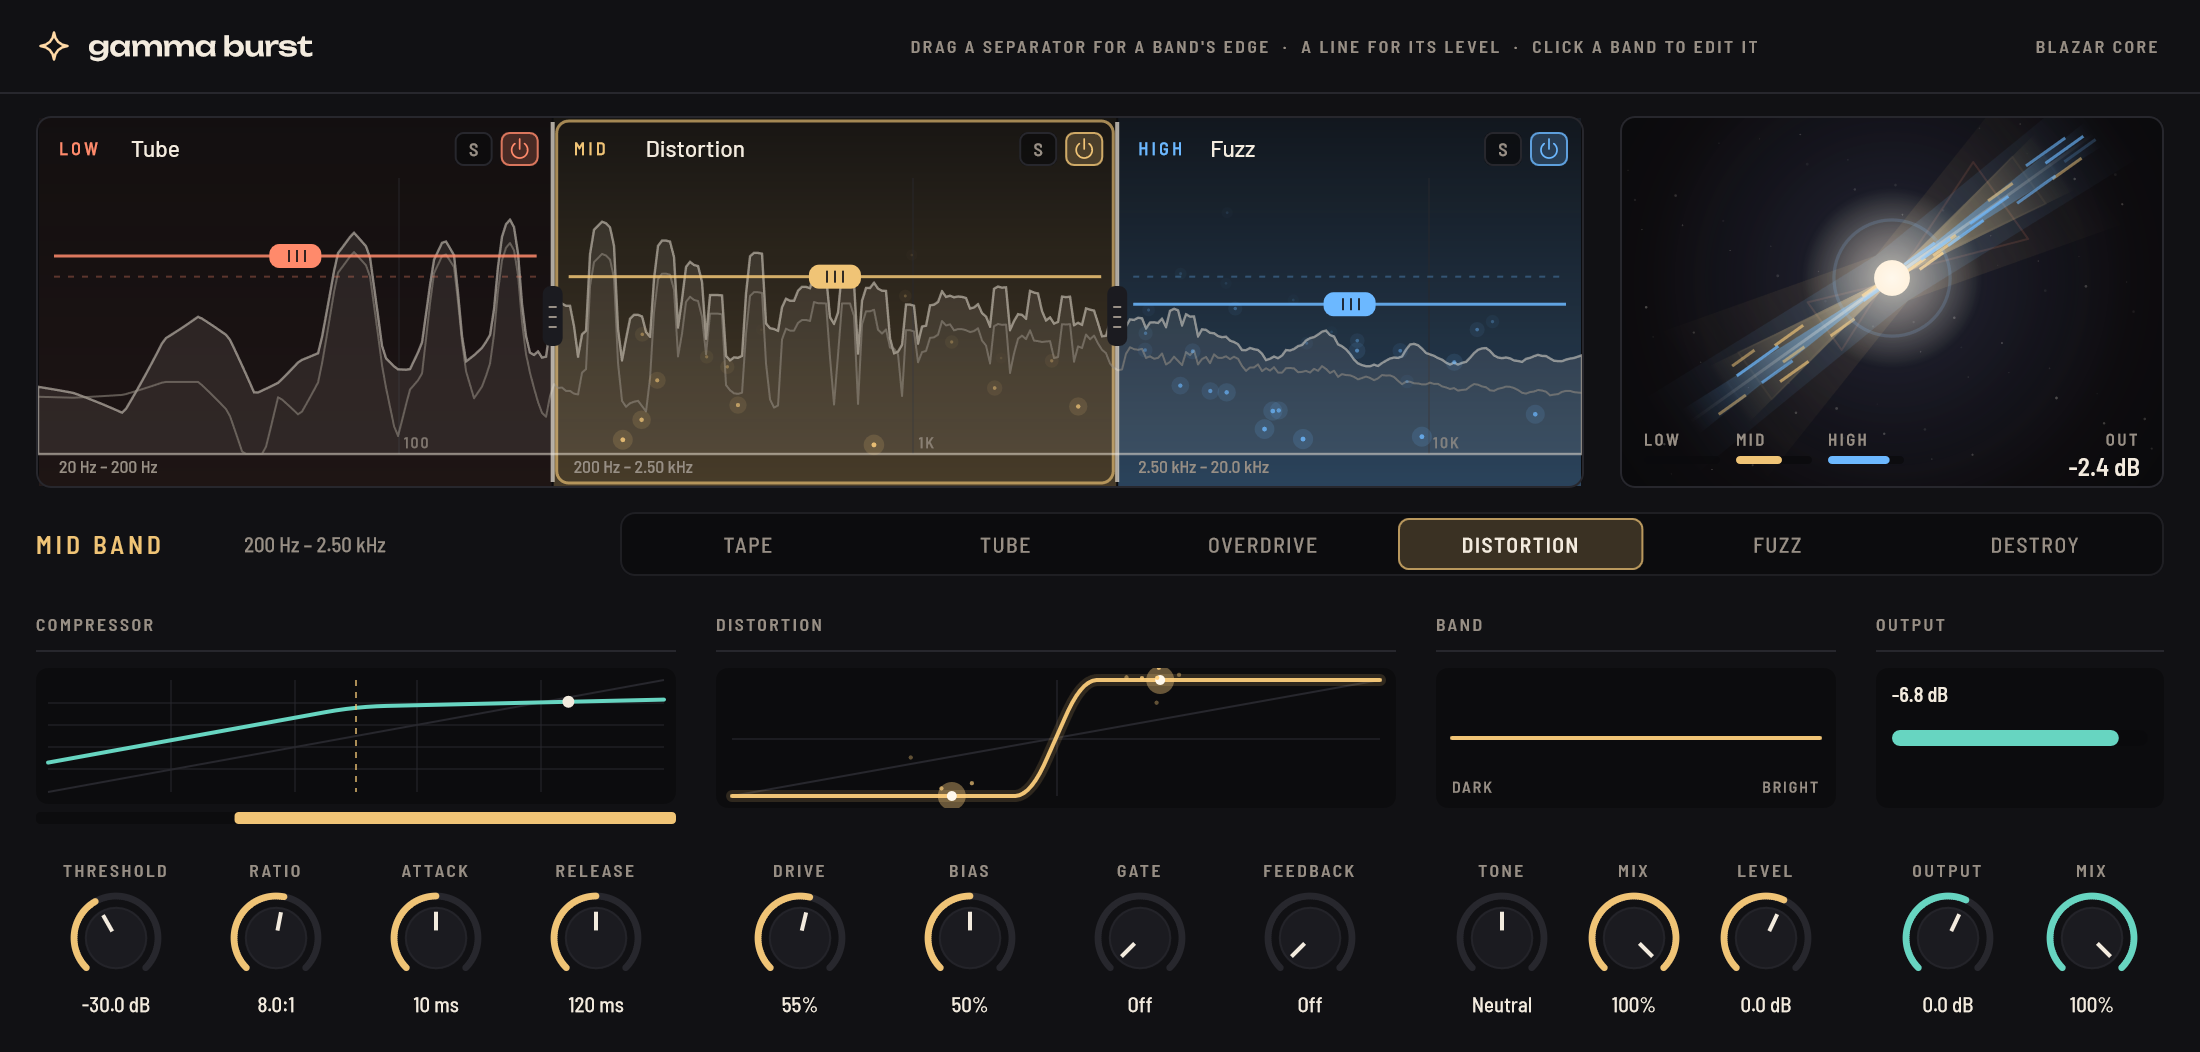
Three-band distortion, tape to fuzz to destroyed, a compressor up to 100:1 in each band.

Redshift’s window

Redshift

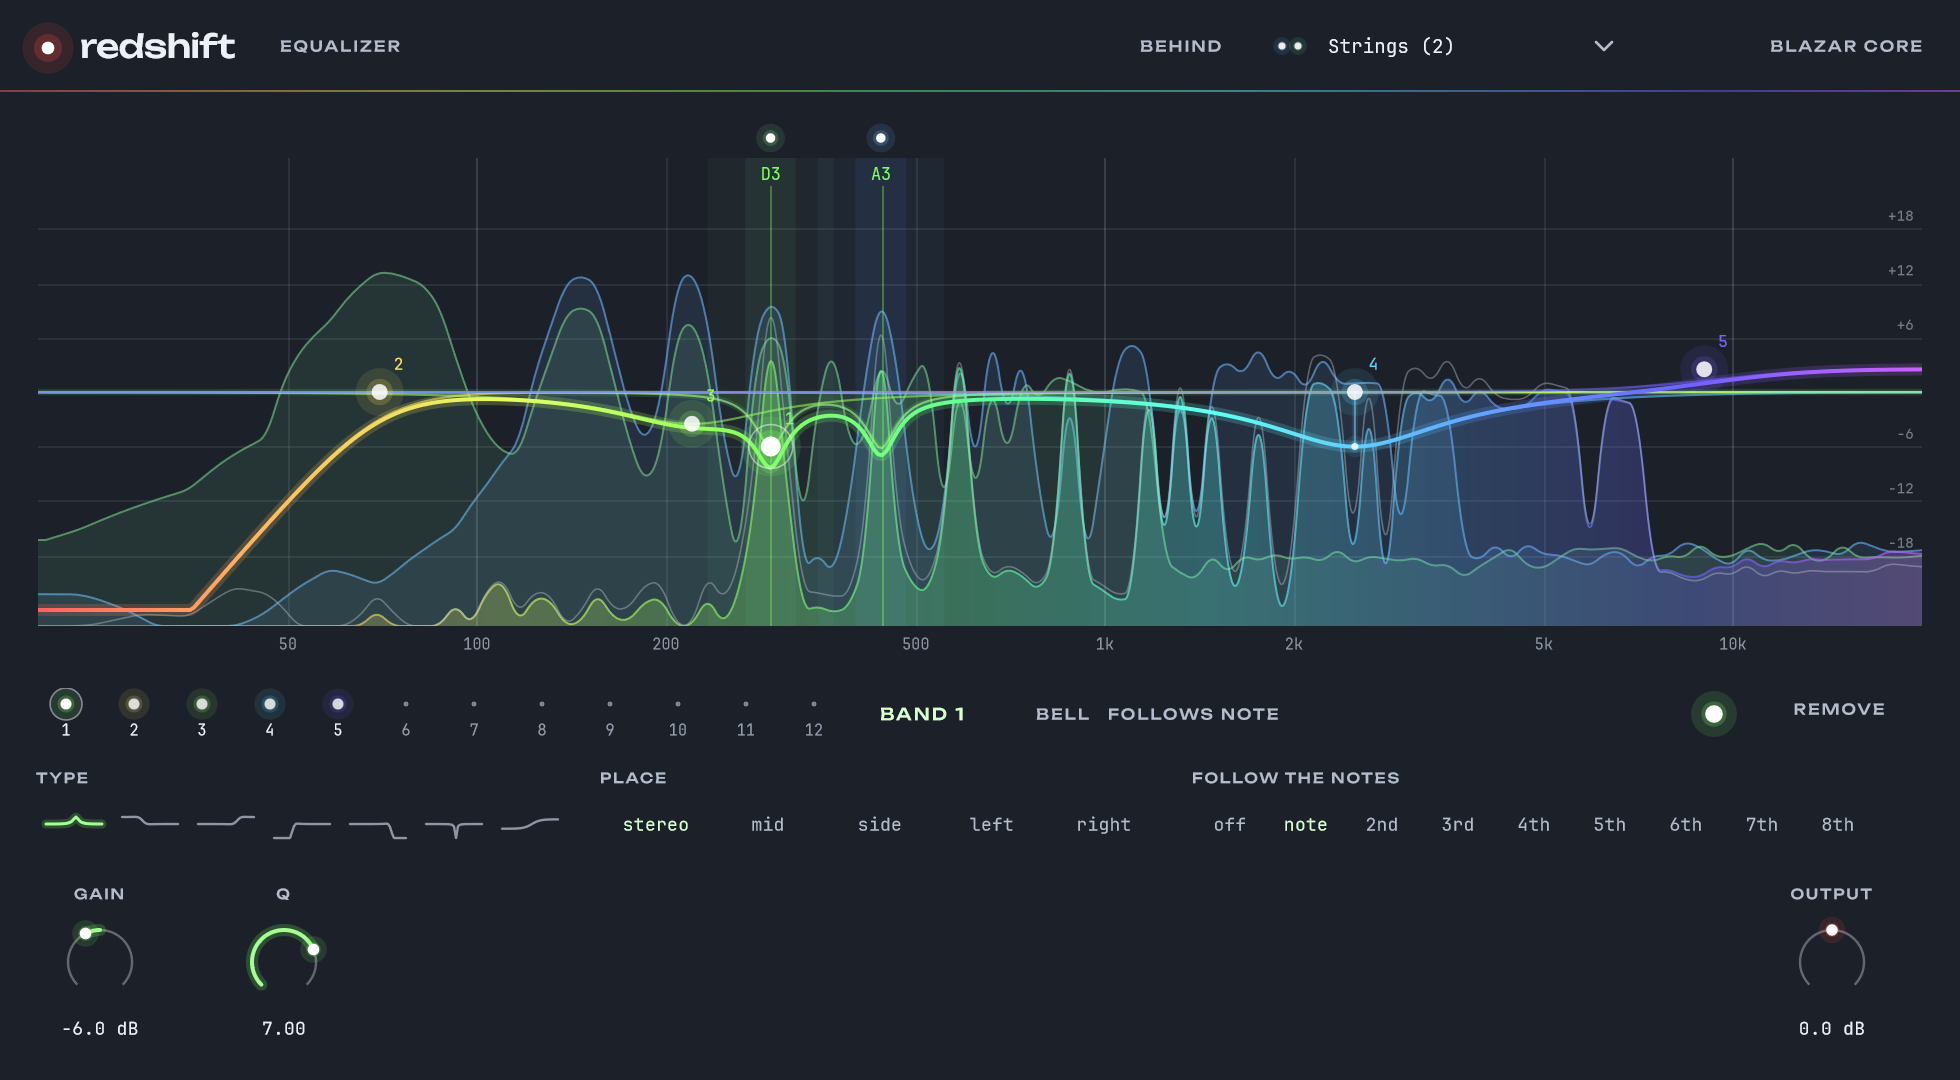
An EQ that shows the other tracks of its folder behind its curve and marks where this one masks them.

Collapsar’s window

Collapsar

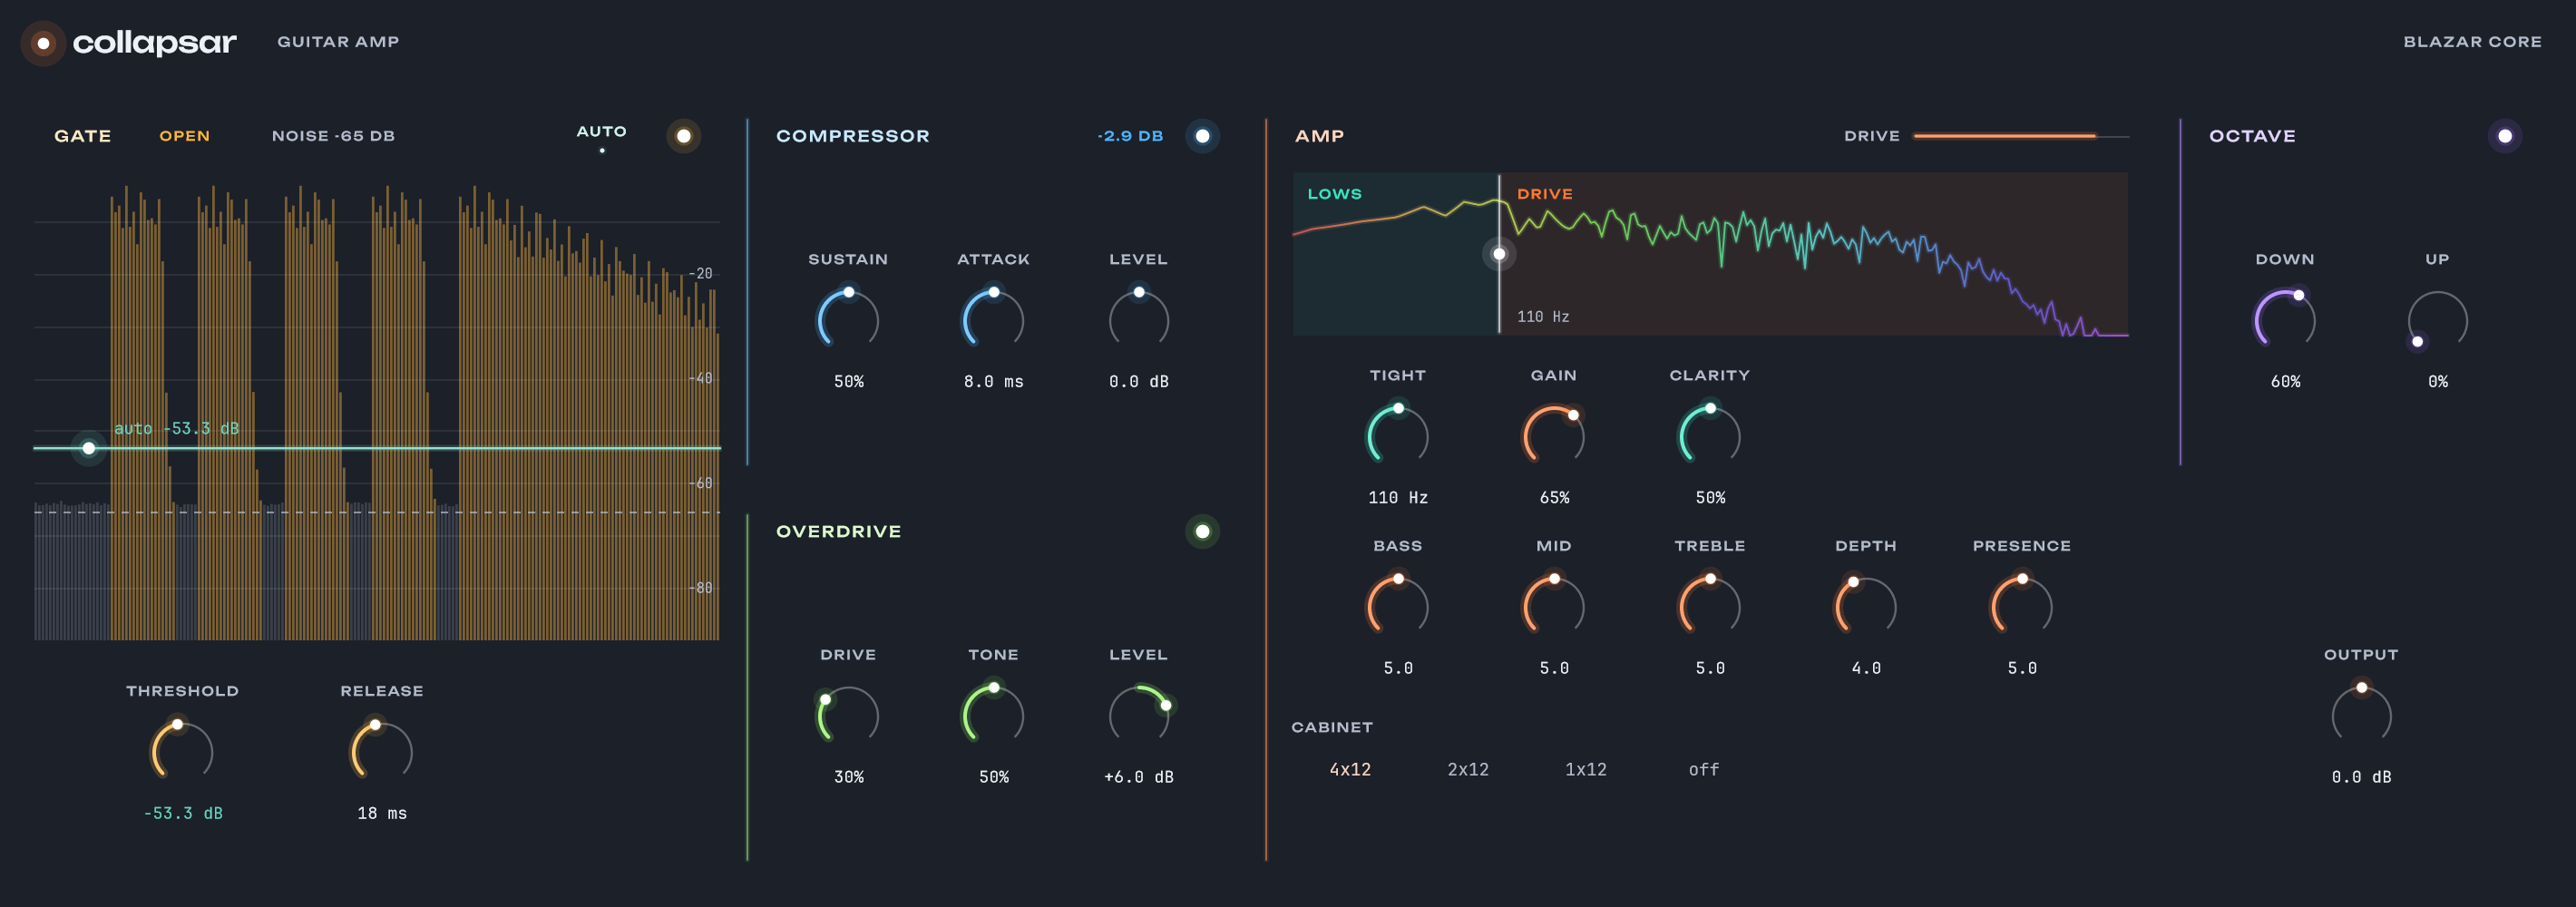
A high-gain tube amp for heavy guitars that stay clear, with a compressor, an overdrive and an octave around it, its cabinets with no impulse responses.

Neutron’s window

Neutron

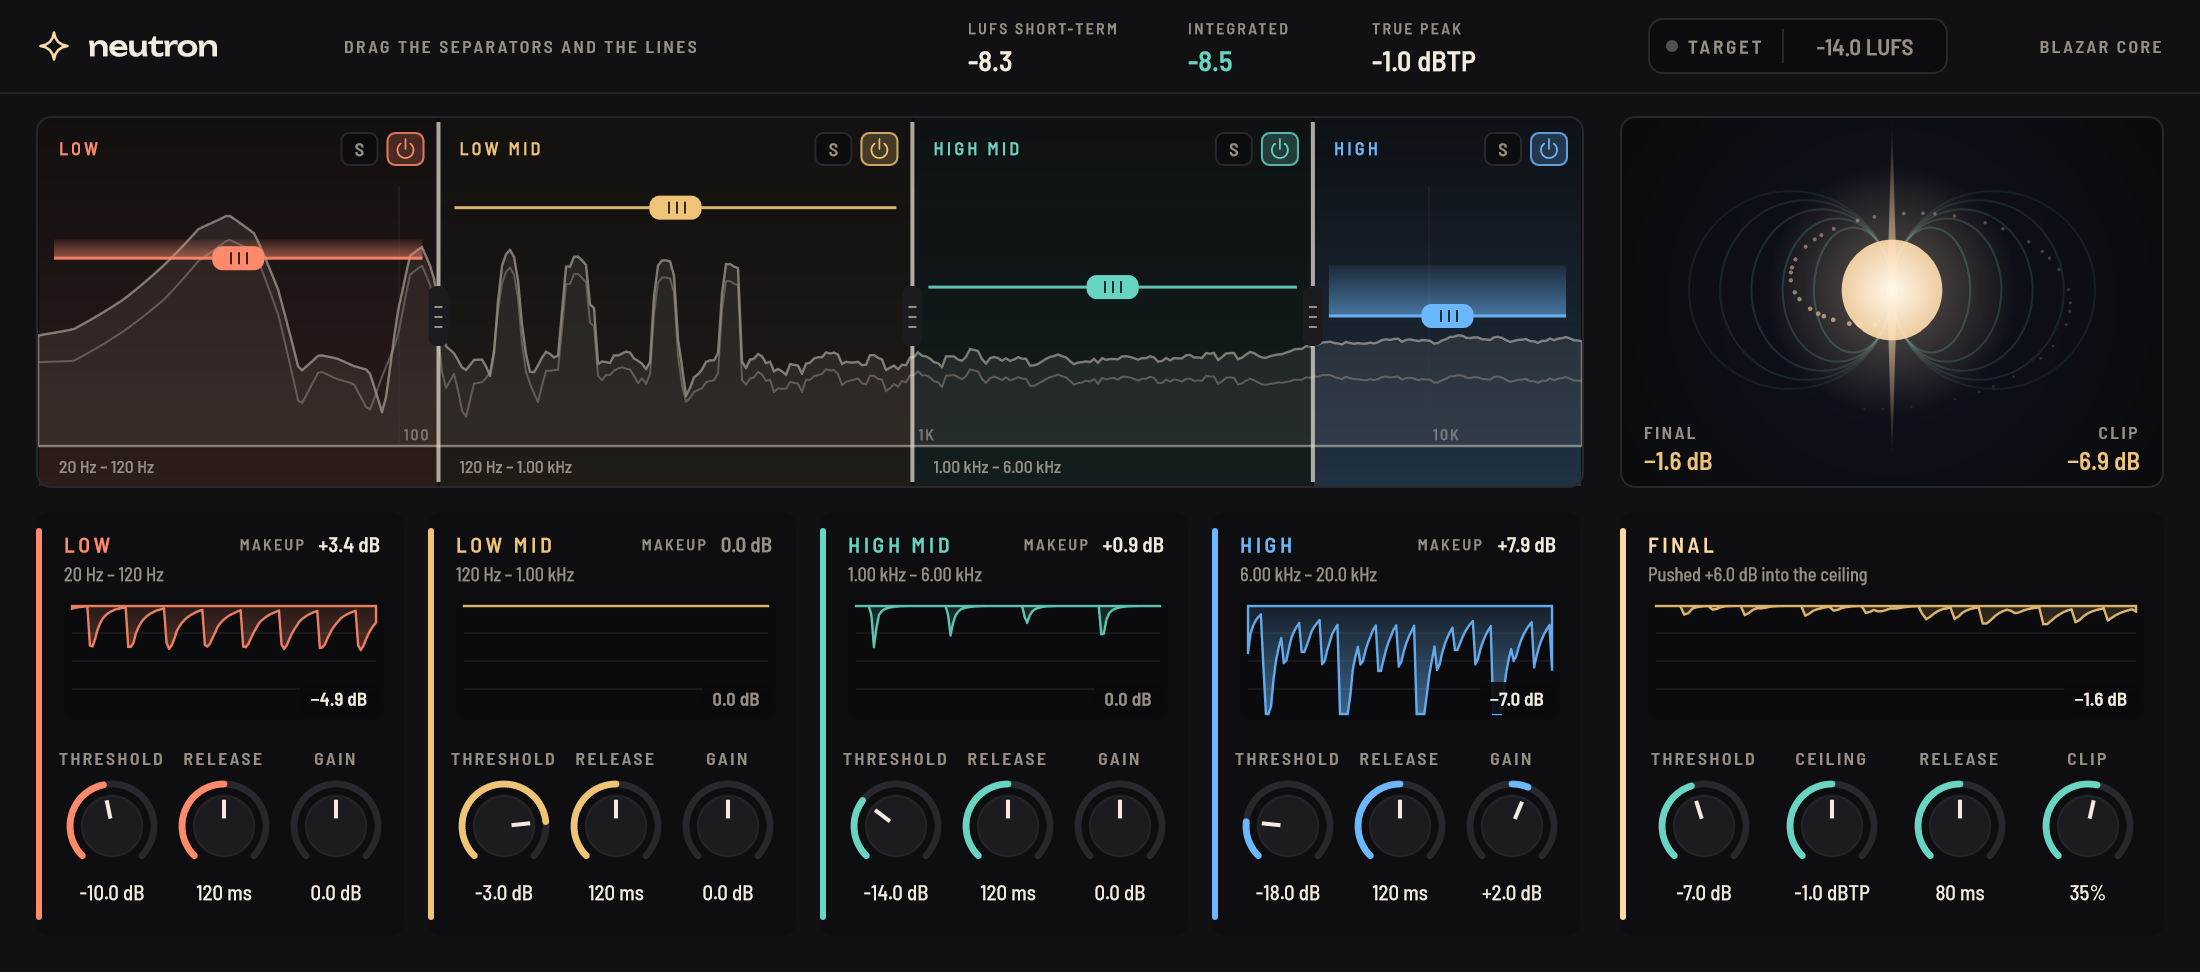
Four-band limiter, then a final limiter that holds the ceiling in true peak.

Eclipse’s window

Eclipse

Cuts the lead’s exact notes out of the bed while the lead plays.

Quasar’s window

Quasar

A delay whose echoes play a rhythm you draw.

Light Cone’s window

Light Cone

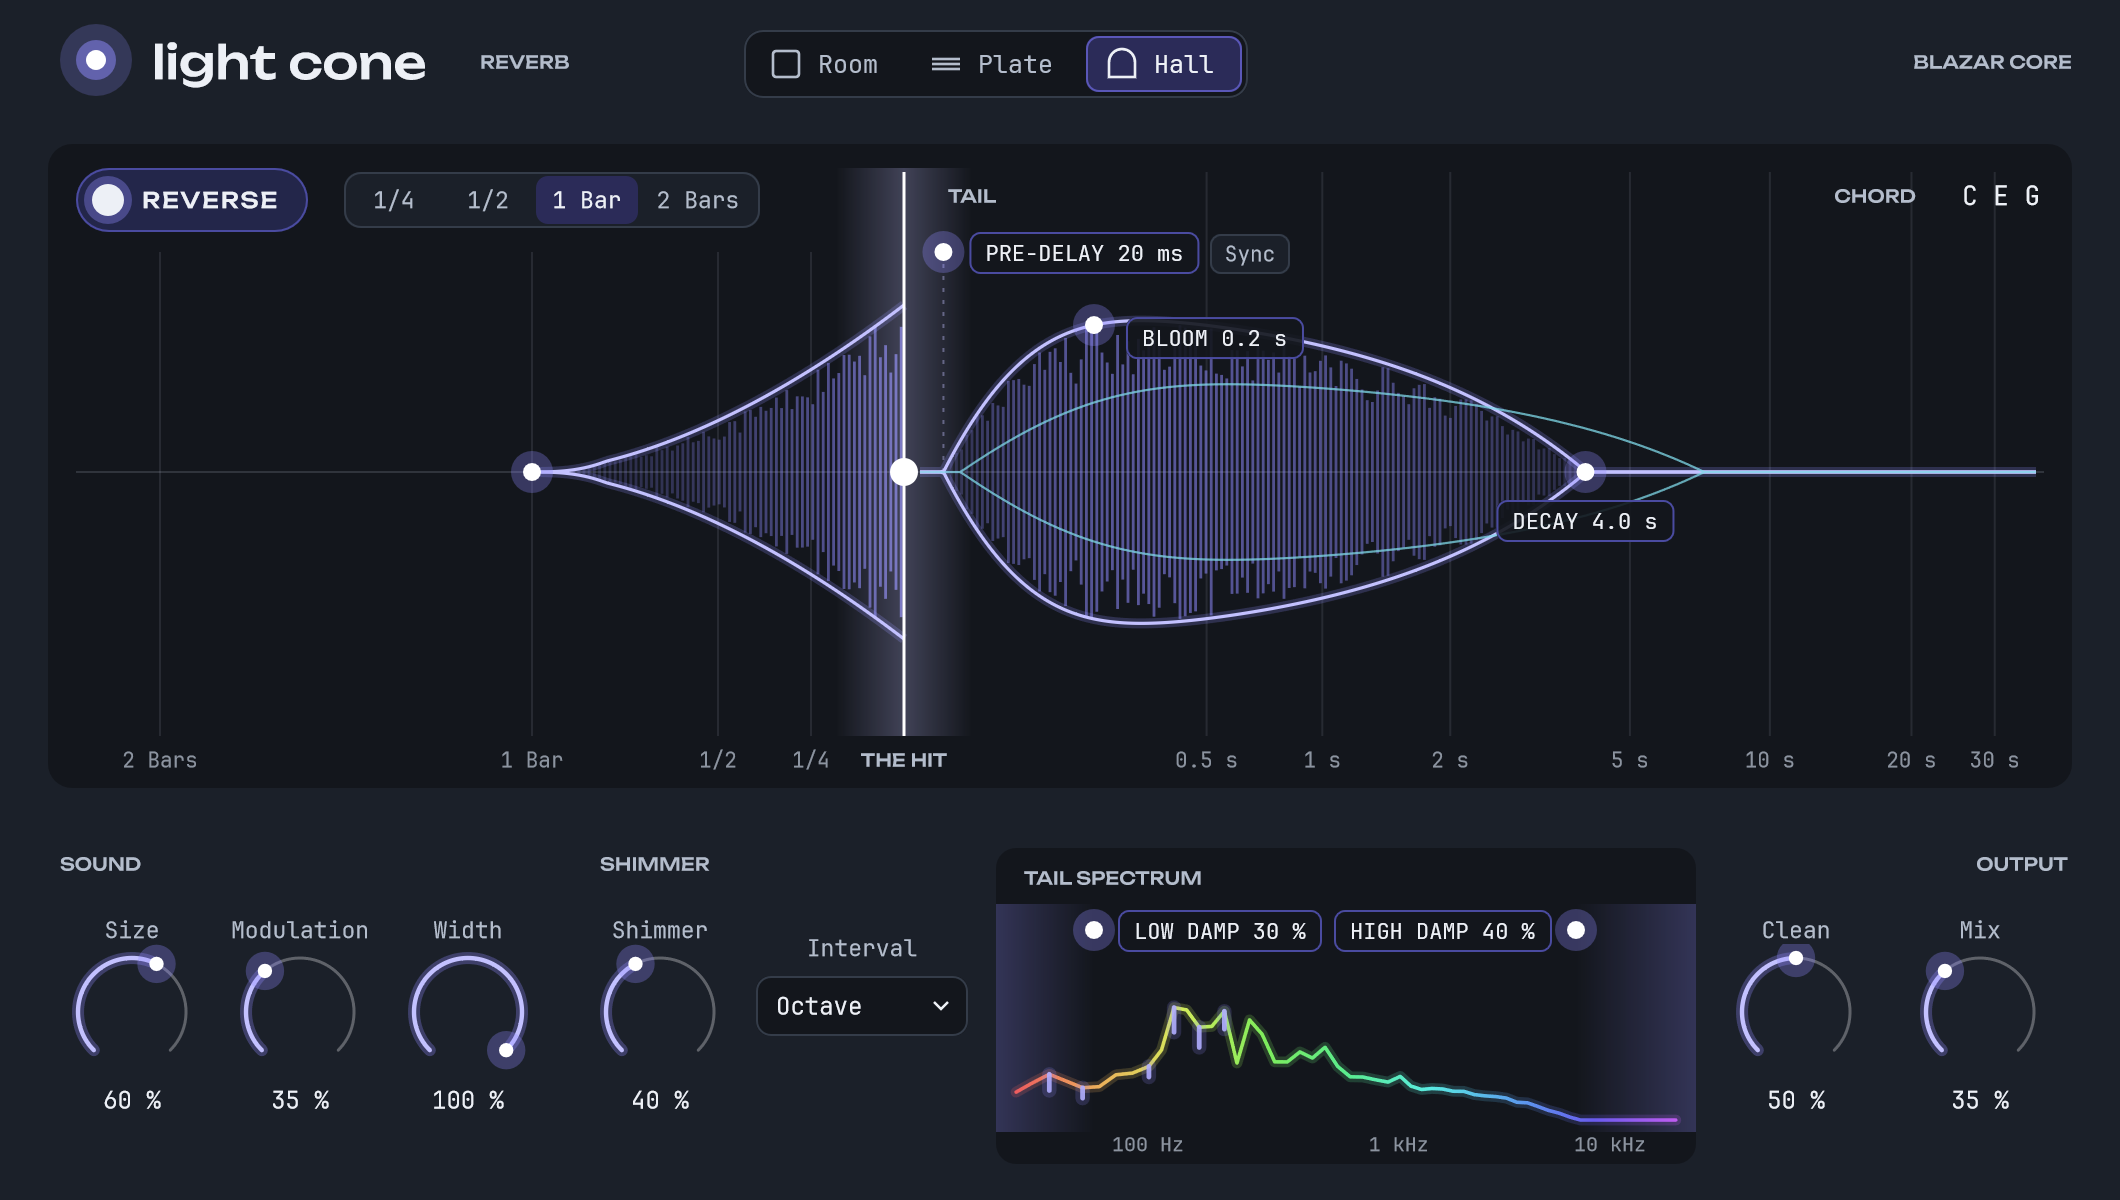
A lush reverb: a shimmer that stays in key, a tail that blooms in, and Clean keeping it clear.

Magnetar’s window

Magnetar

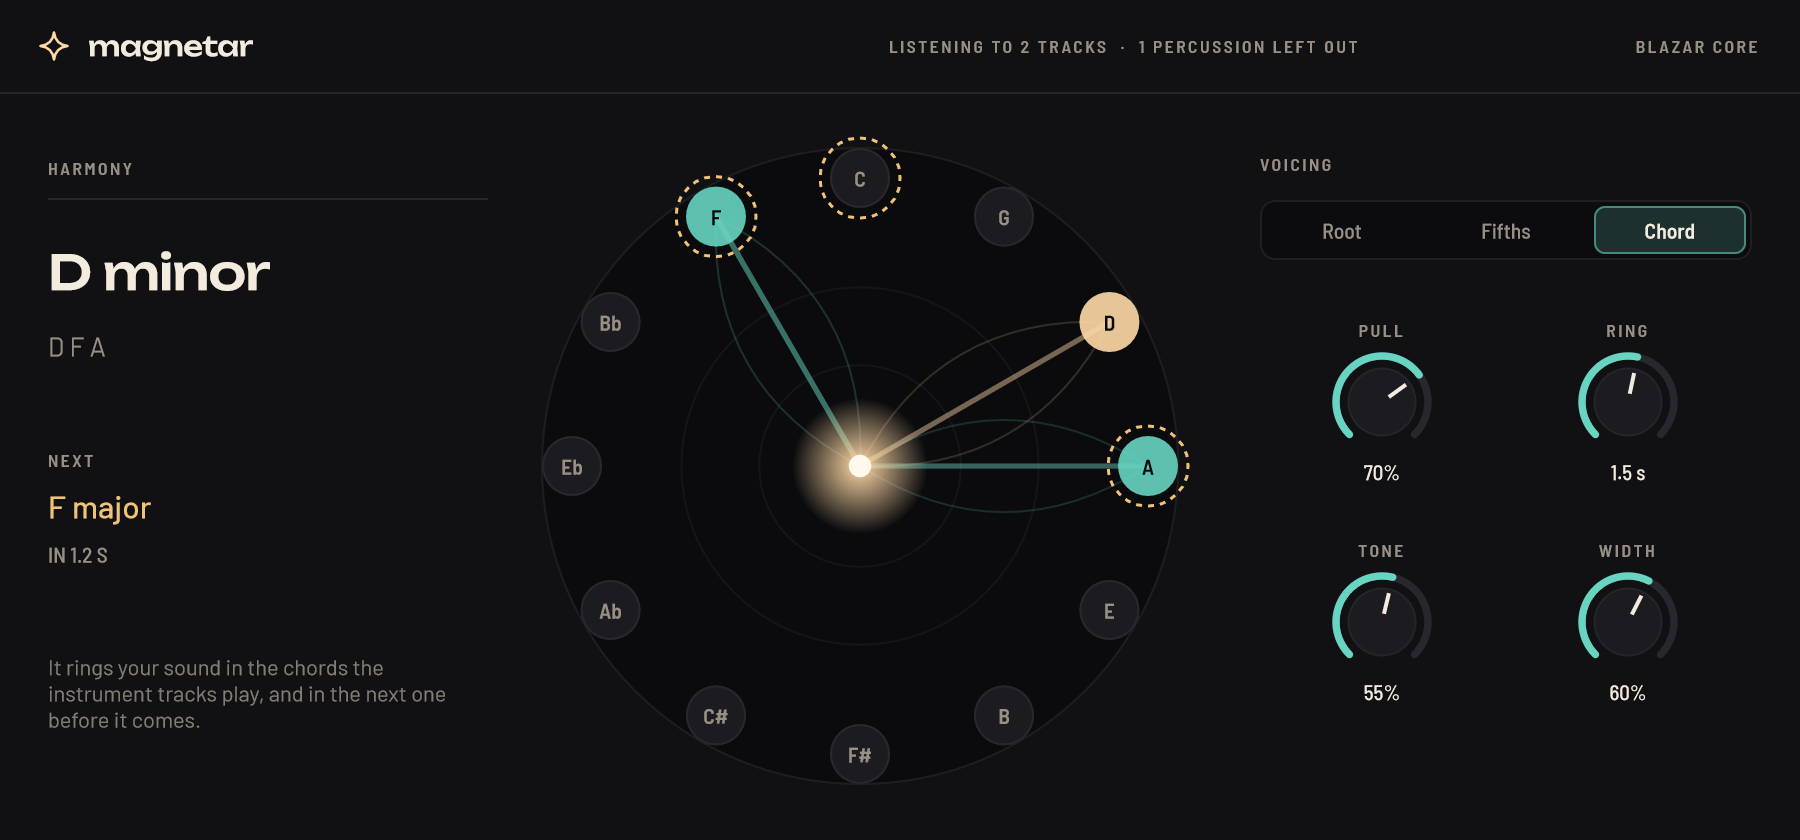
Rings your sound design in the key of the score, chord by chord.

Pulsar’s window

Pulsar

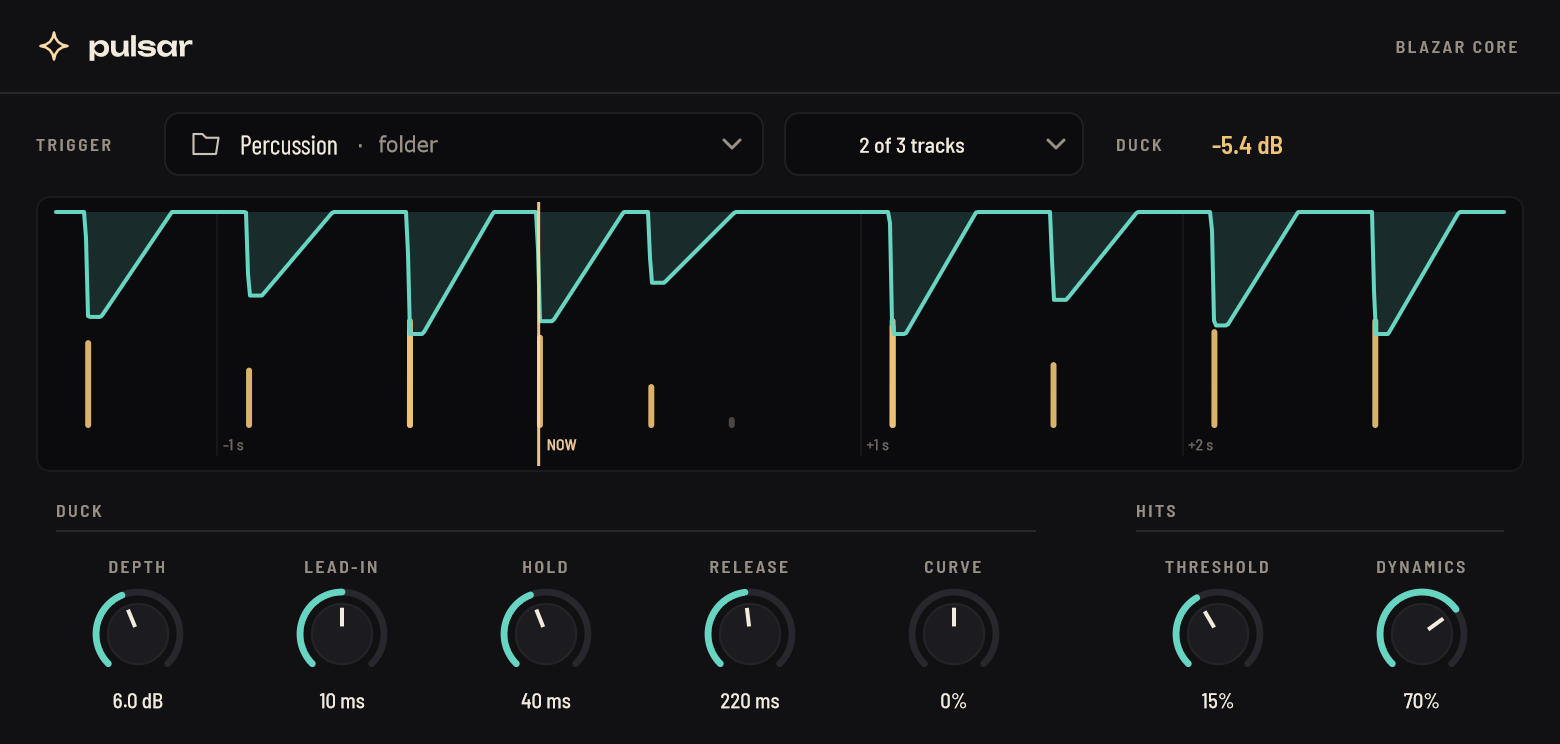
Ducking that starts before the hit lands, read from the arrangement.

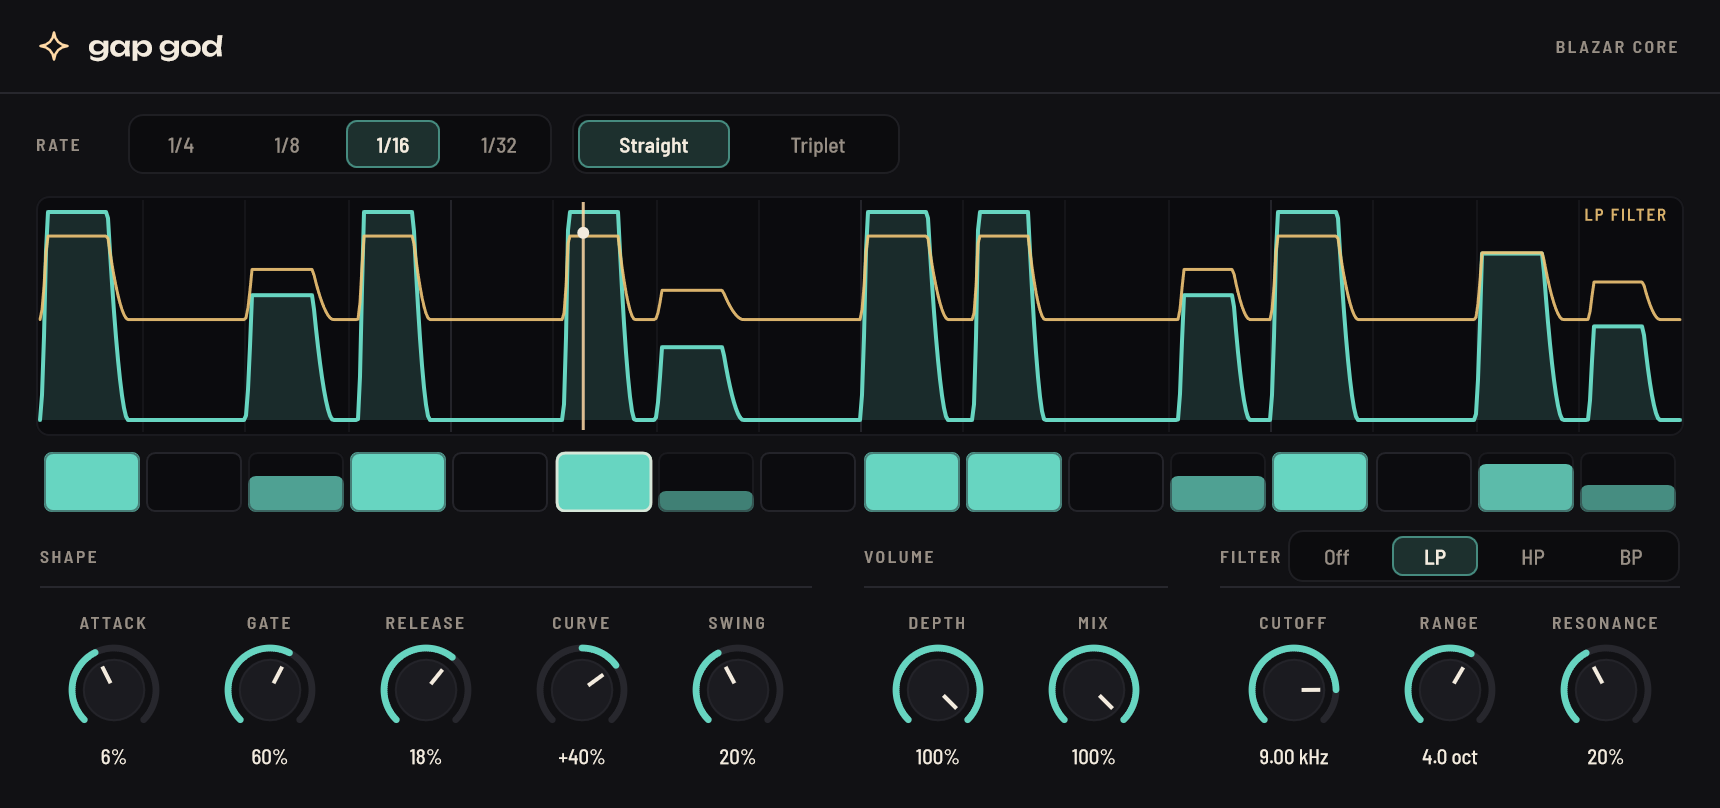
Gap God’s window

Gap God

A sixteen-step chopper in time with the song, by volume or filter.

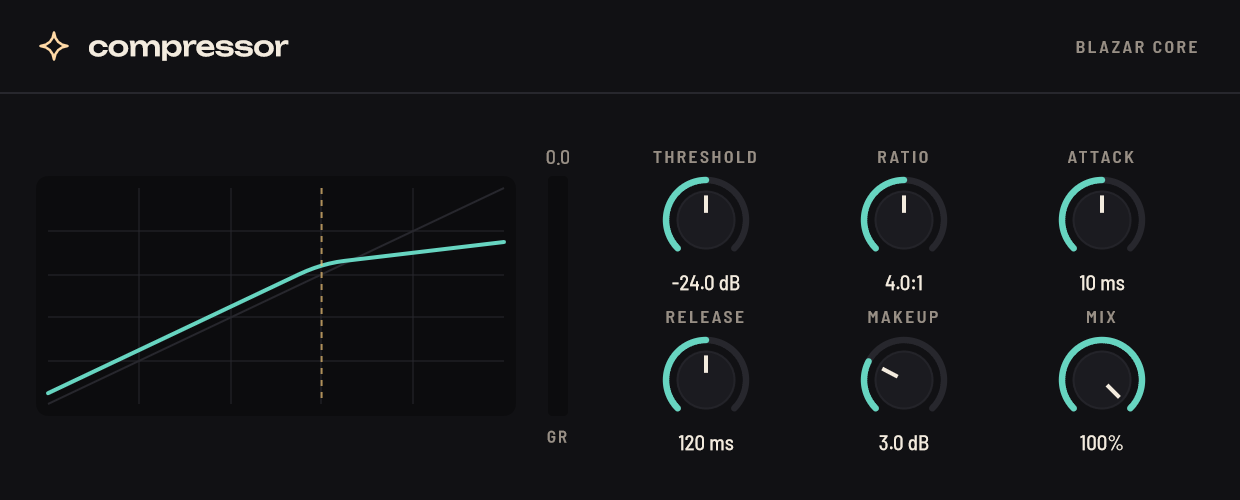
Blazar Compressor’s window

Blazar Compressor

A stereo-linked compressor with a soft knee and its curve in view.

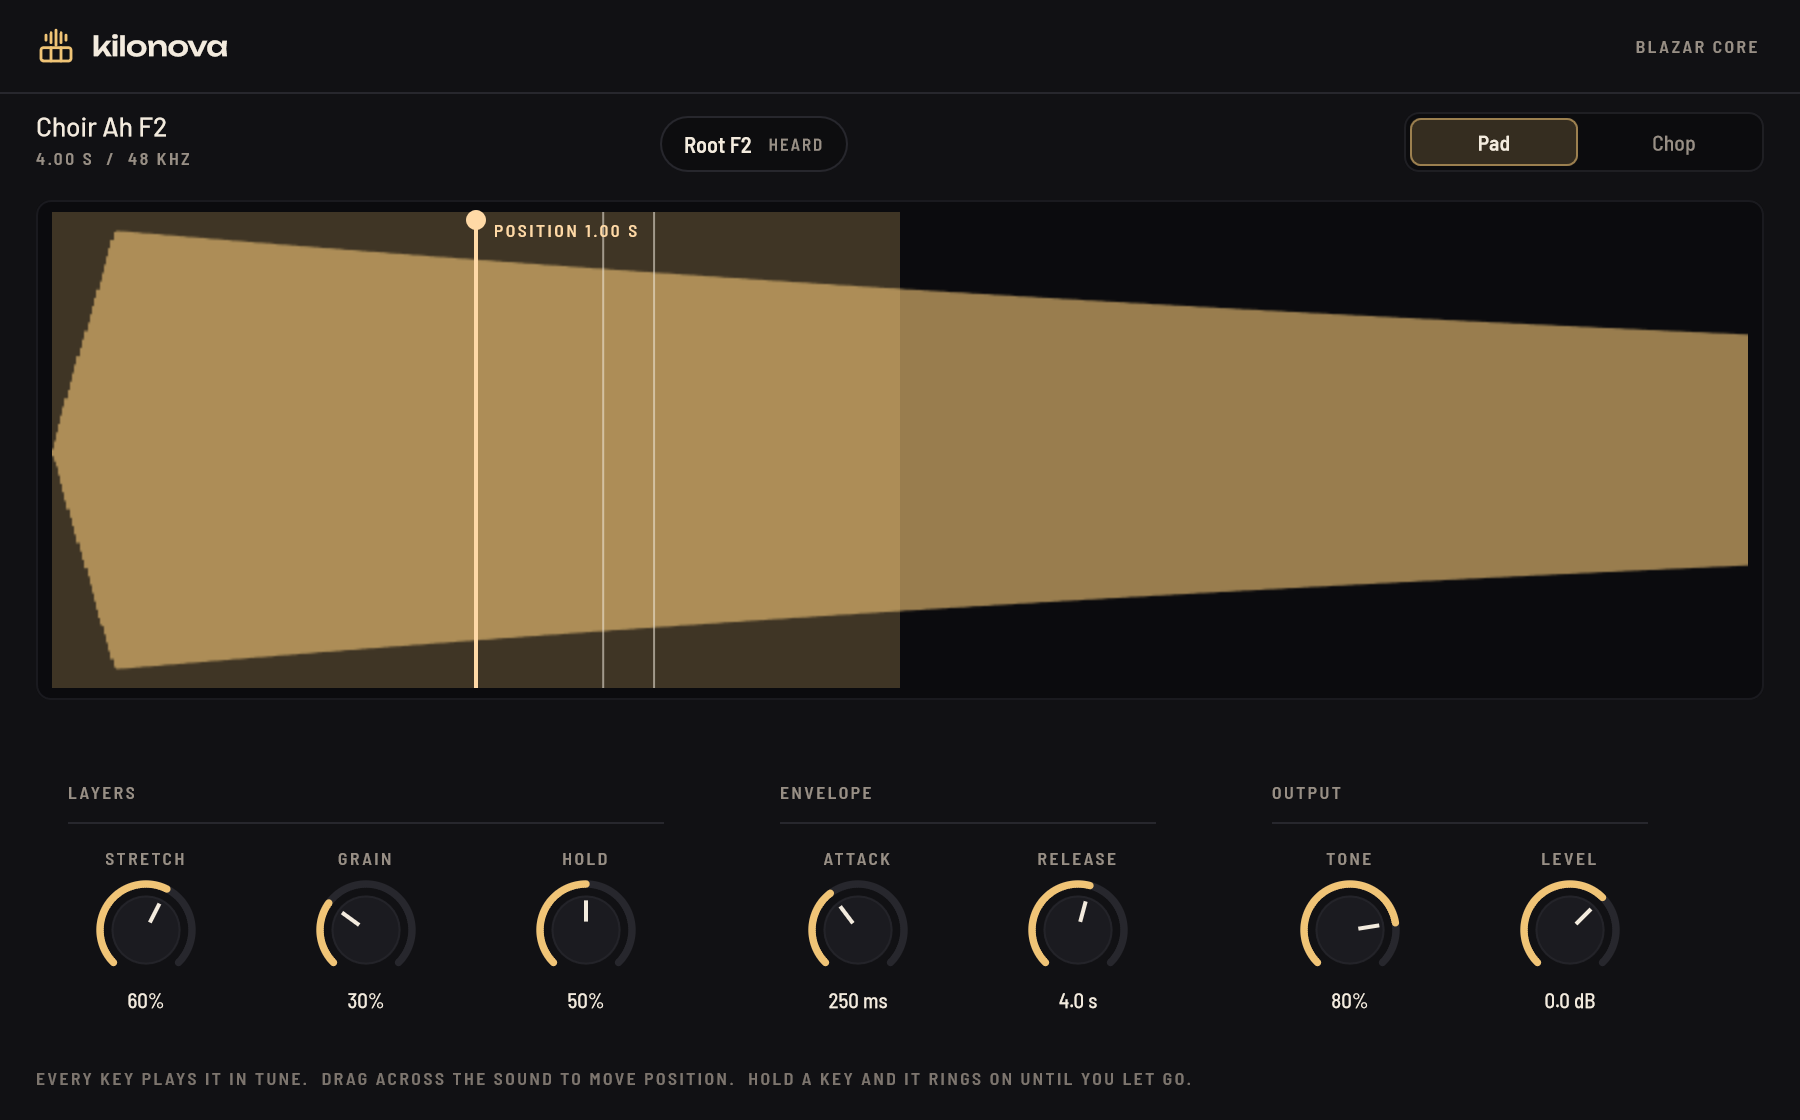
Kilonova’s window

Kilonova

The sampler: pads that hold forever, or loops chopped at their hits.

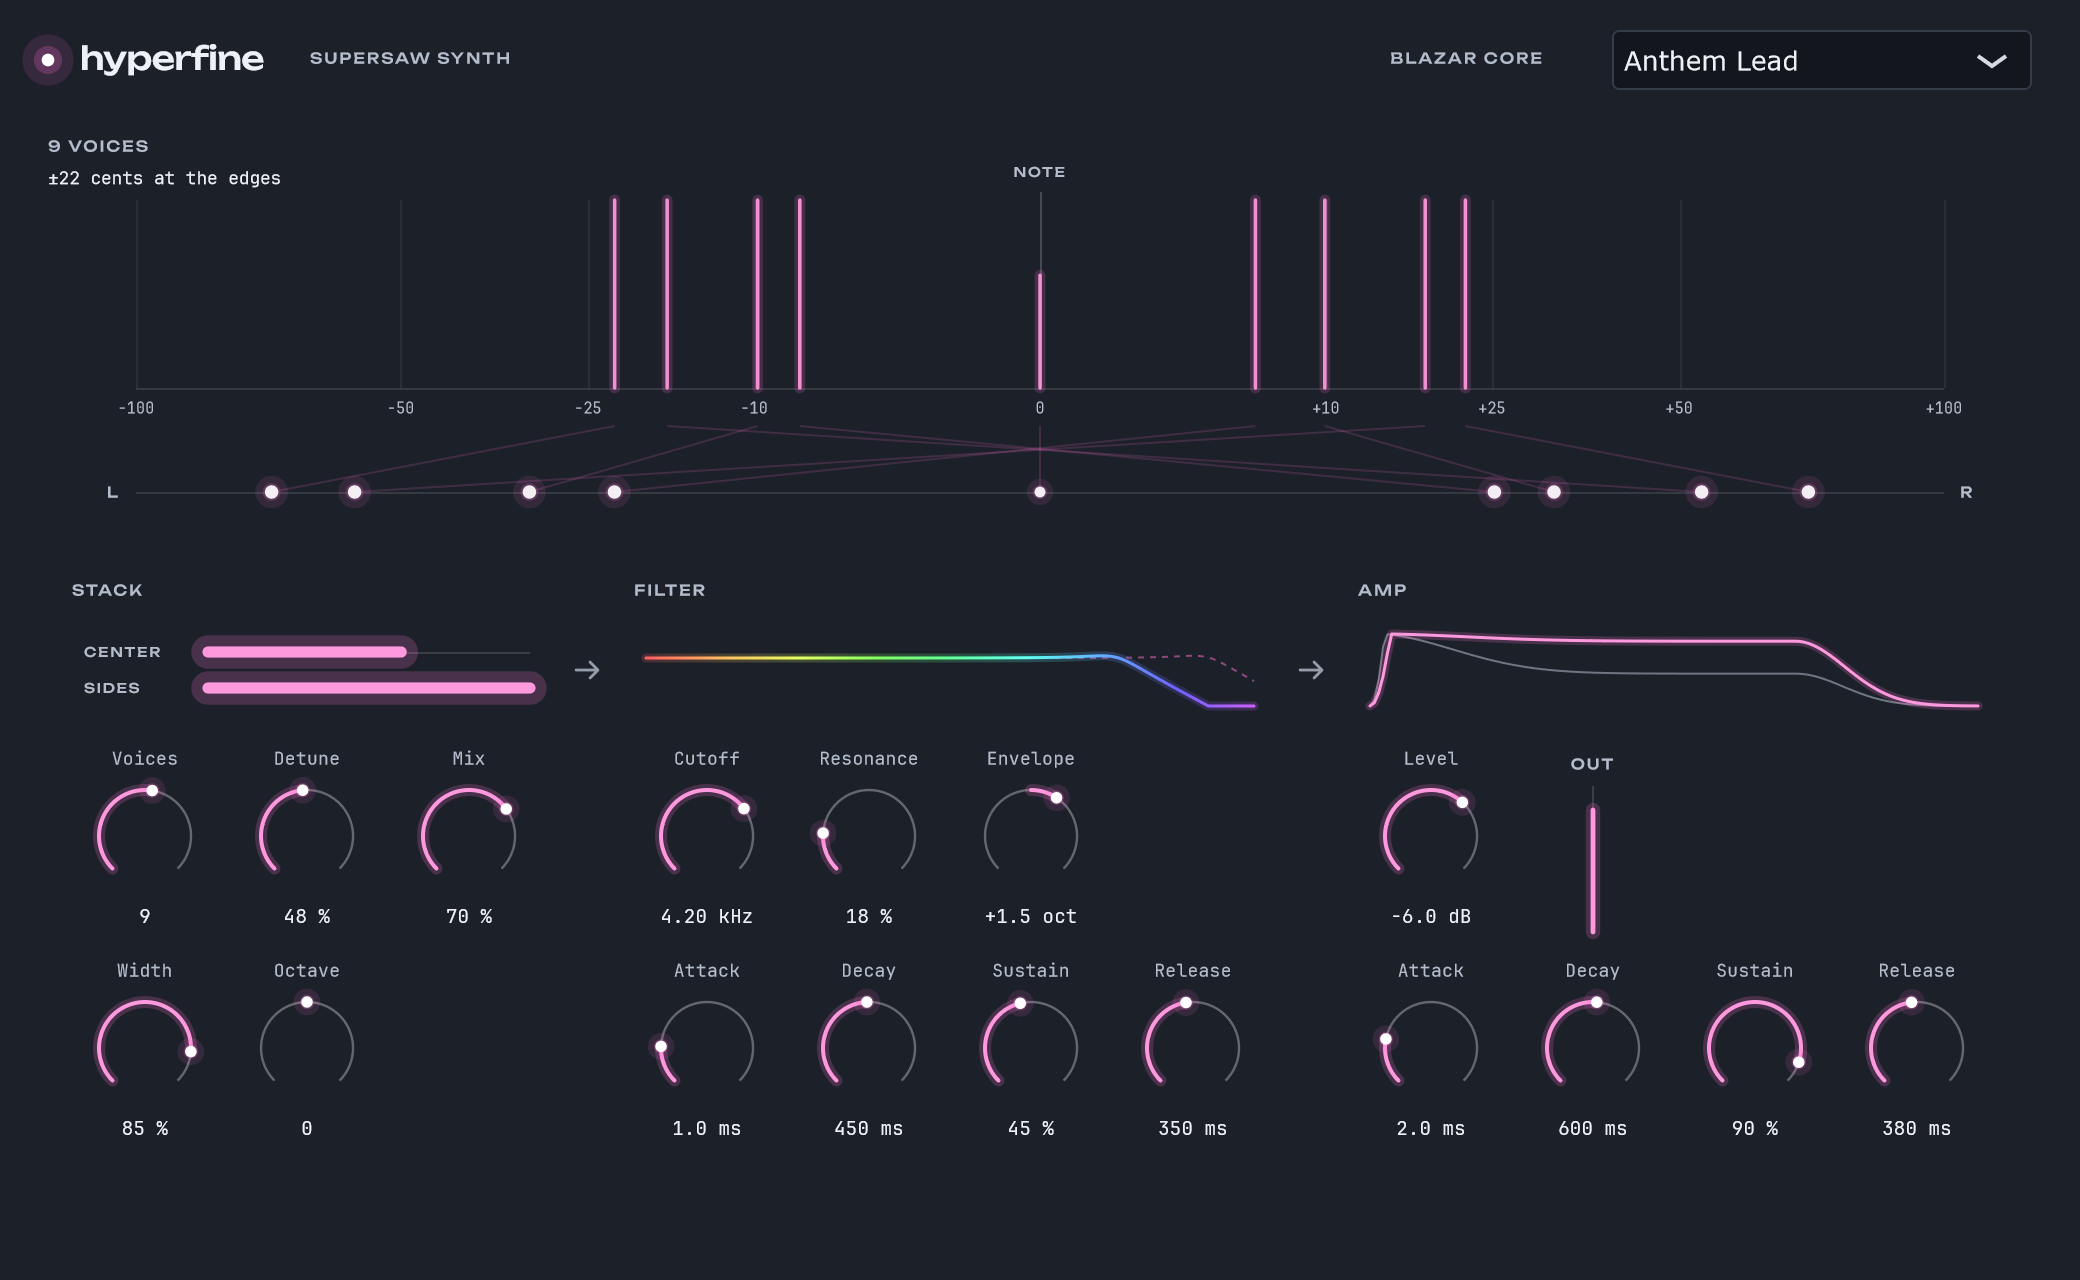
Hyperfine’s window

Hyperfine

The supersaw synth: up to 16 detuned saws a note, for wide leads, big chords, plucks and pads.

Perigee’s window

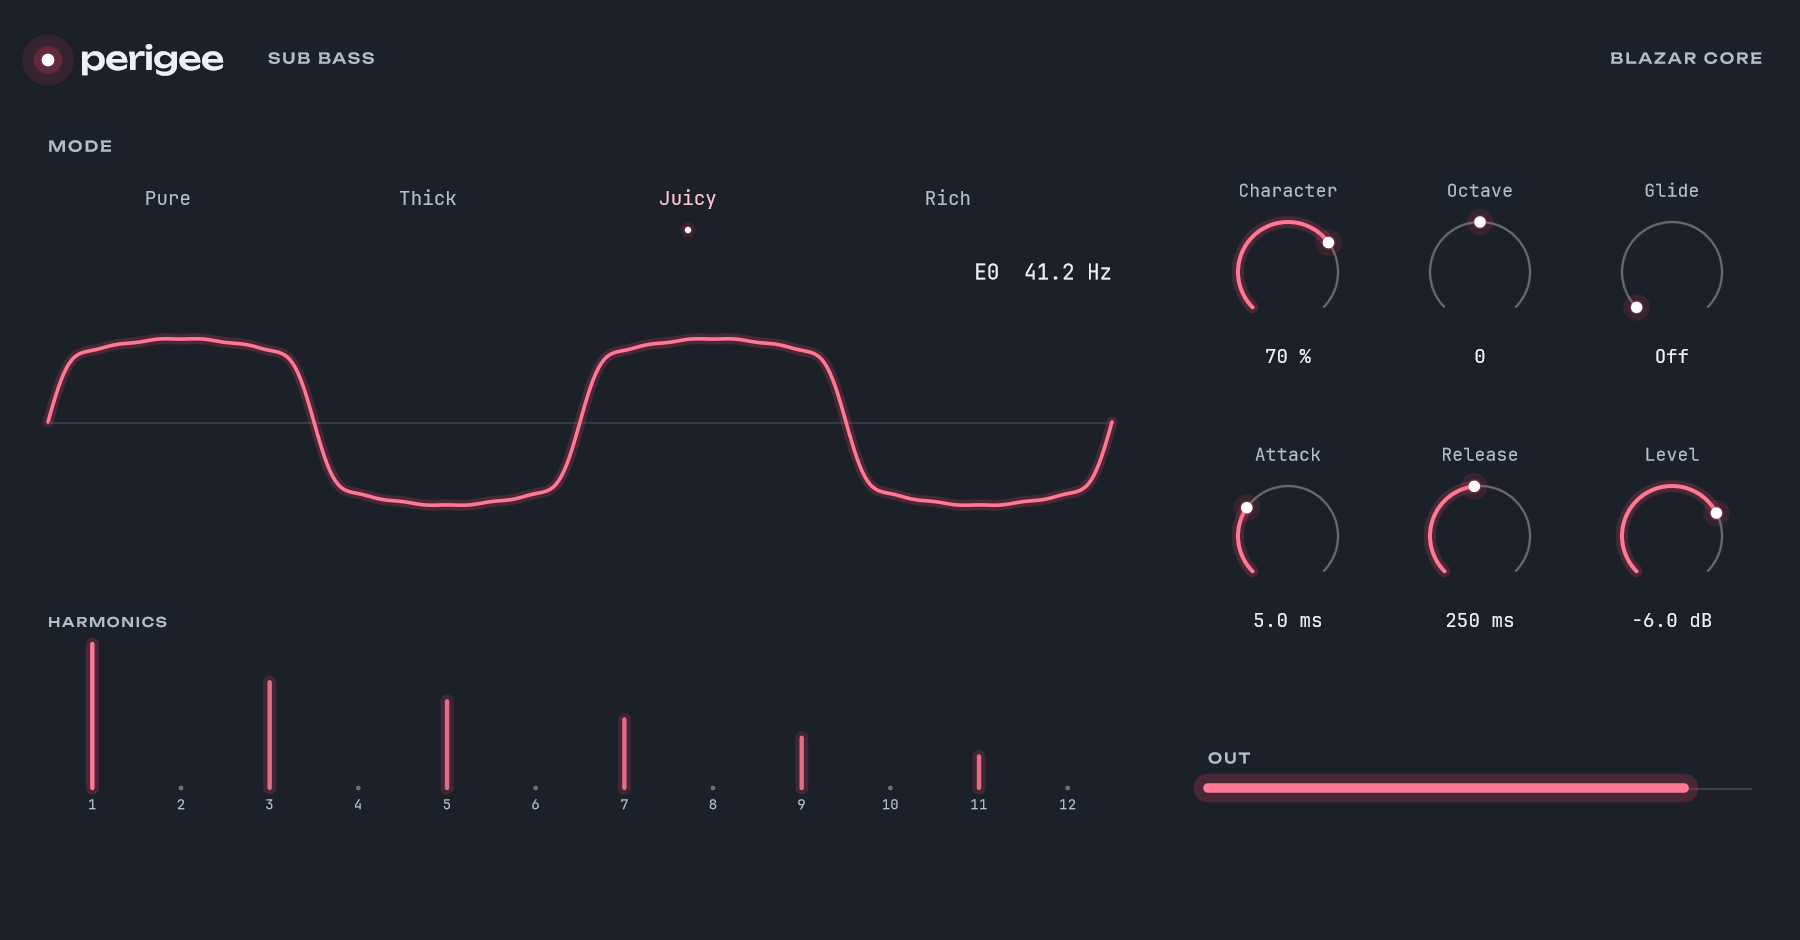
Perigee

The sub bass: a clean sine, or thick, juicy or rich with harmonics on top, under the low strings and brass.

Orrery’s window

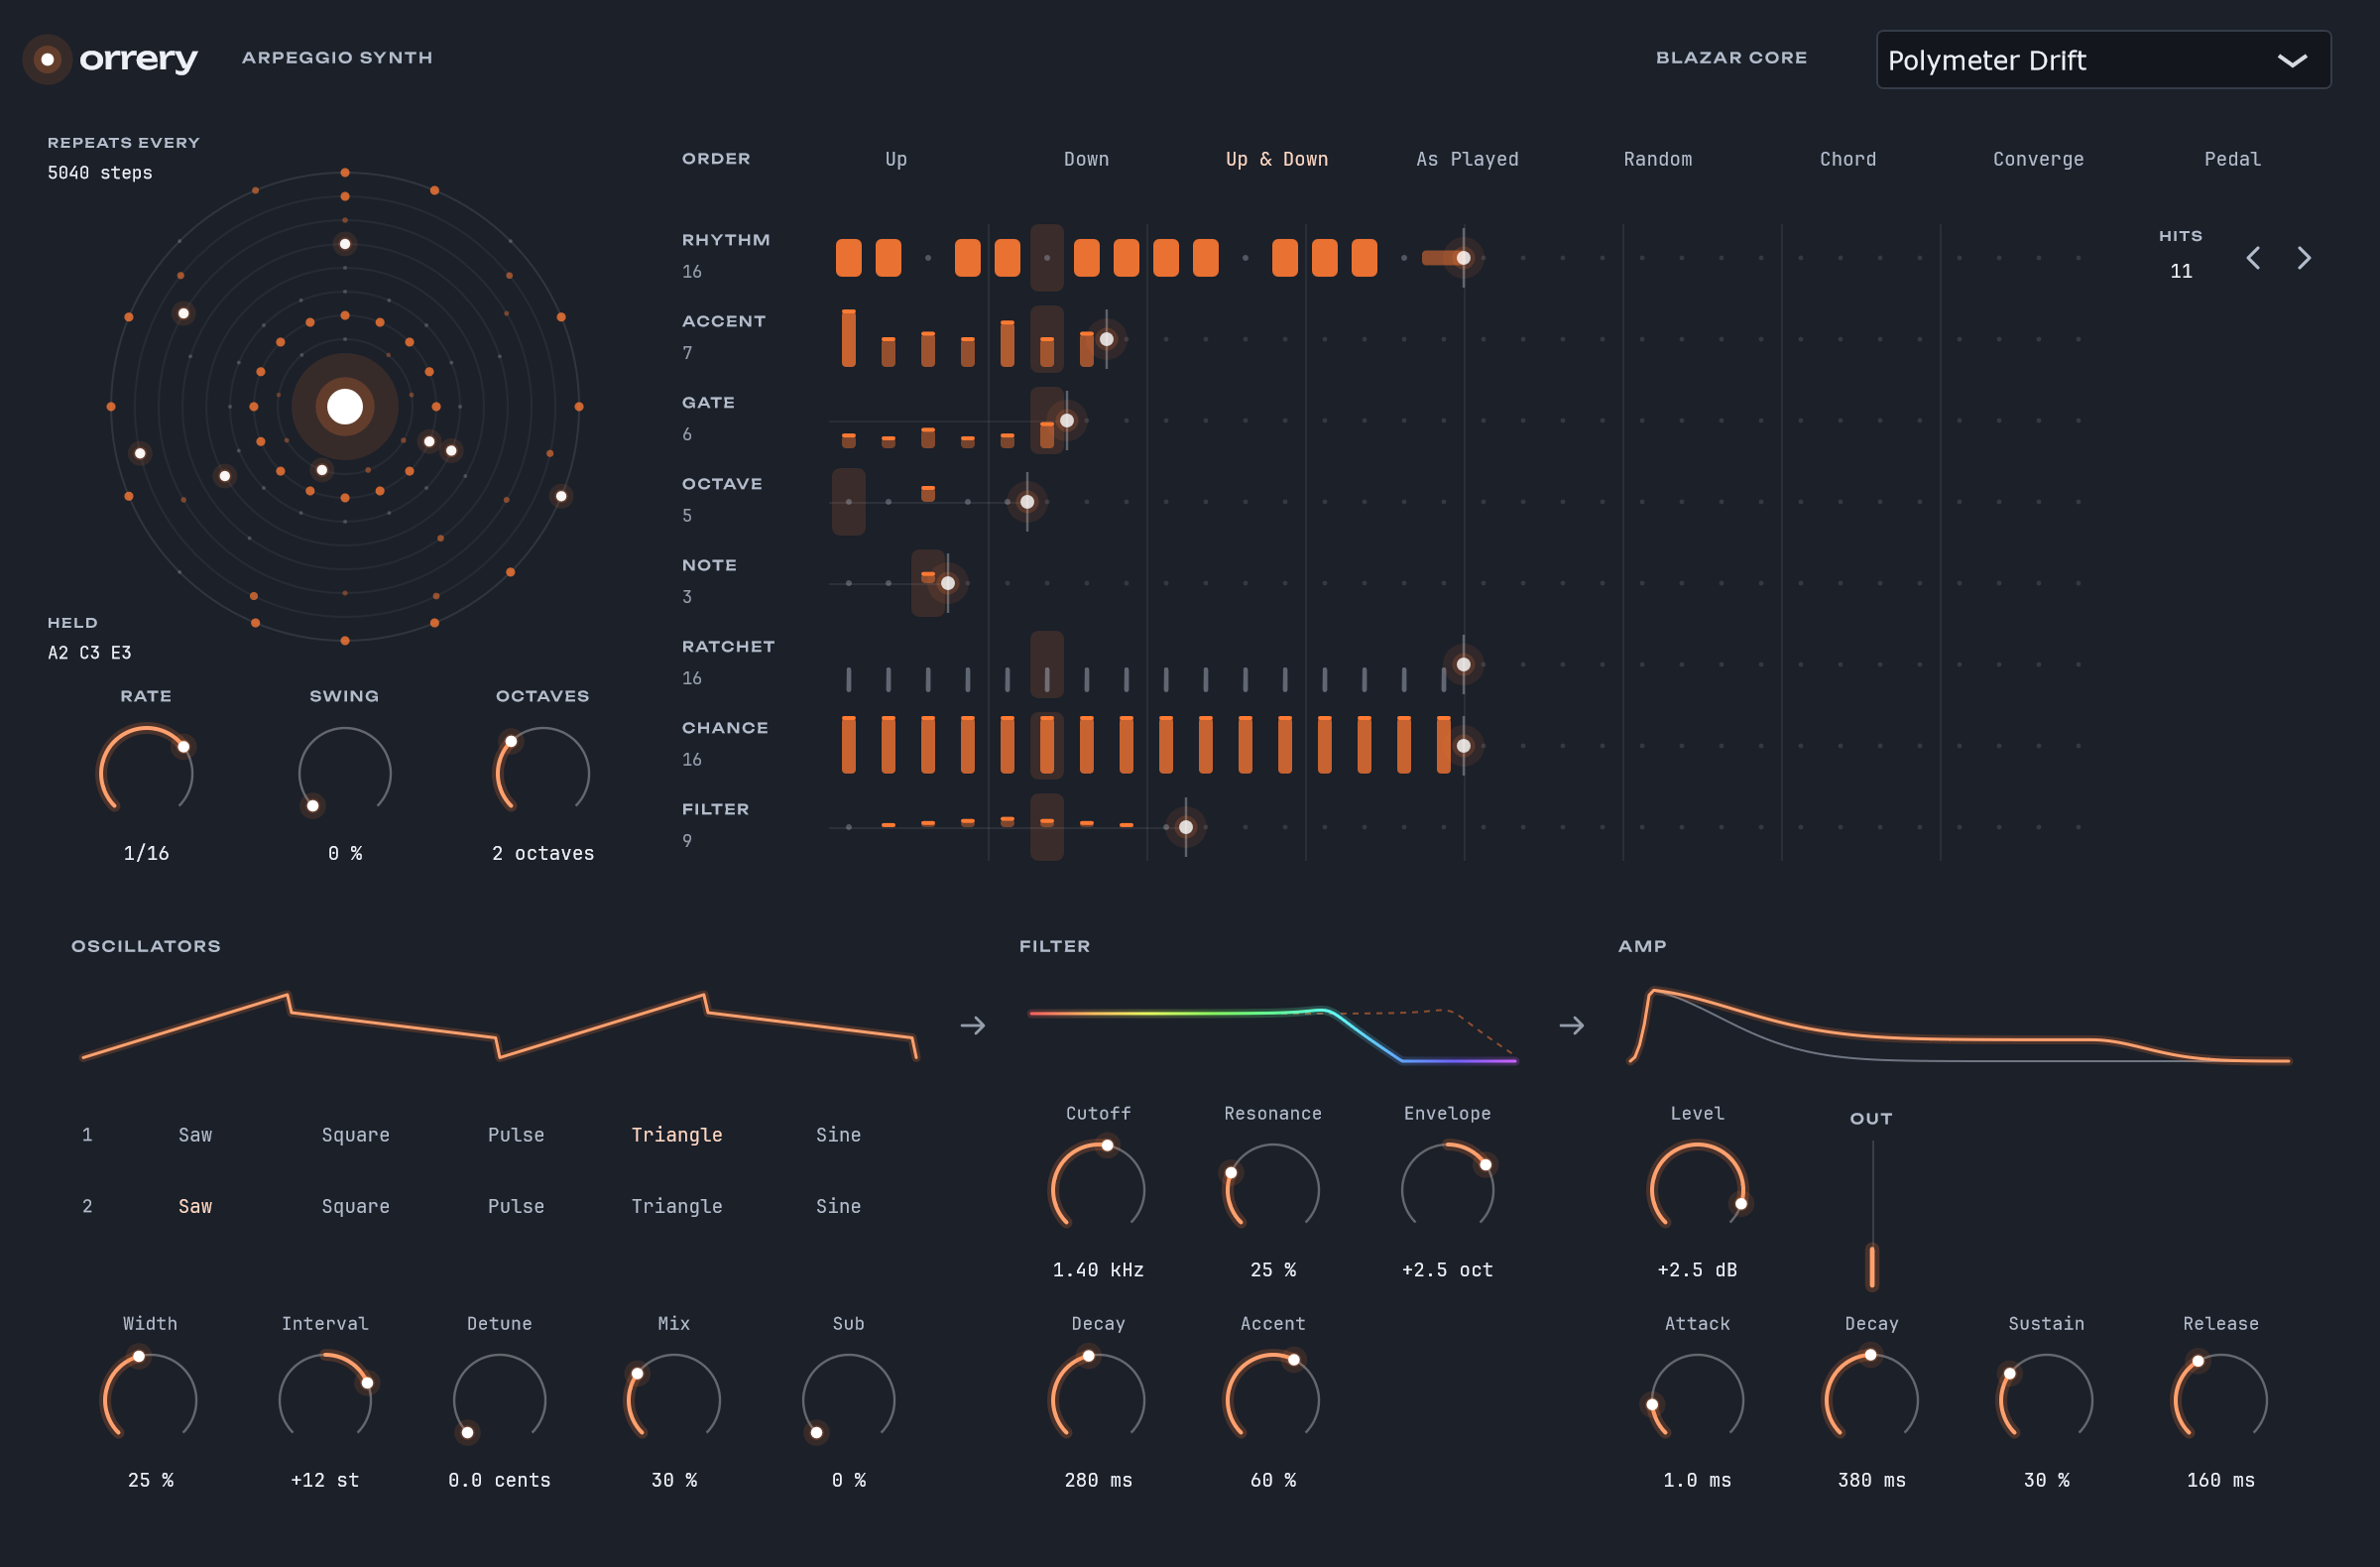
Orrery

The arpeggio synth: a held chord played as an ostinato in time with the session, its lanes each a length of their own.

Slingshot’s window

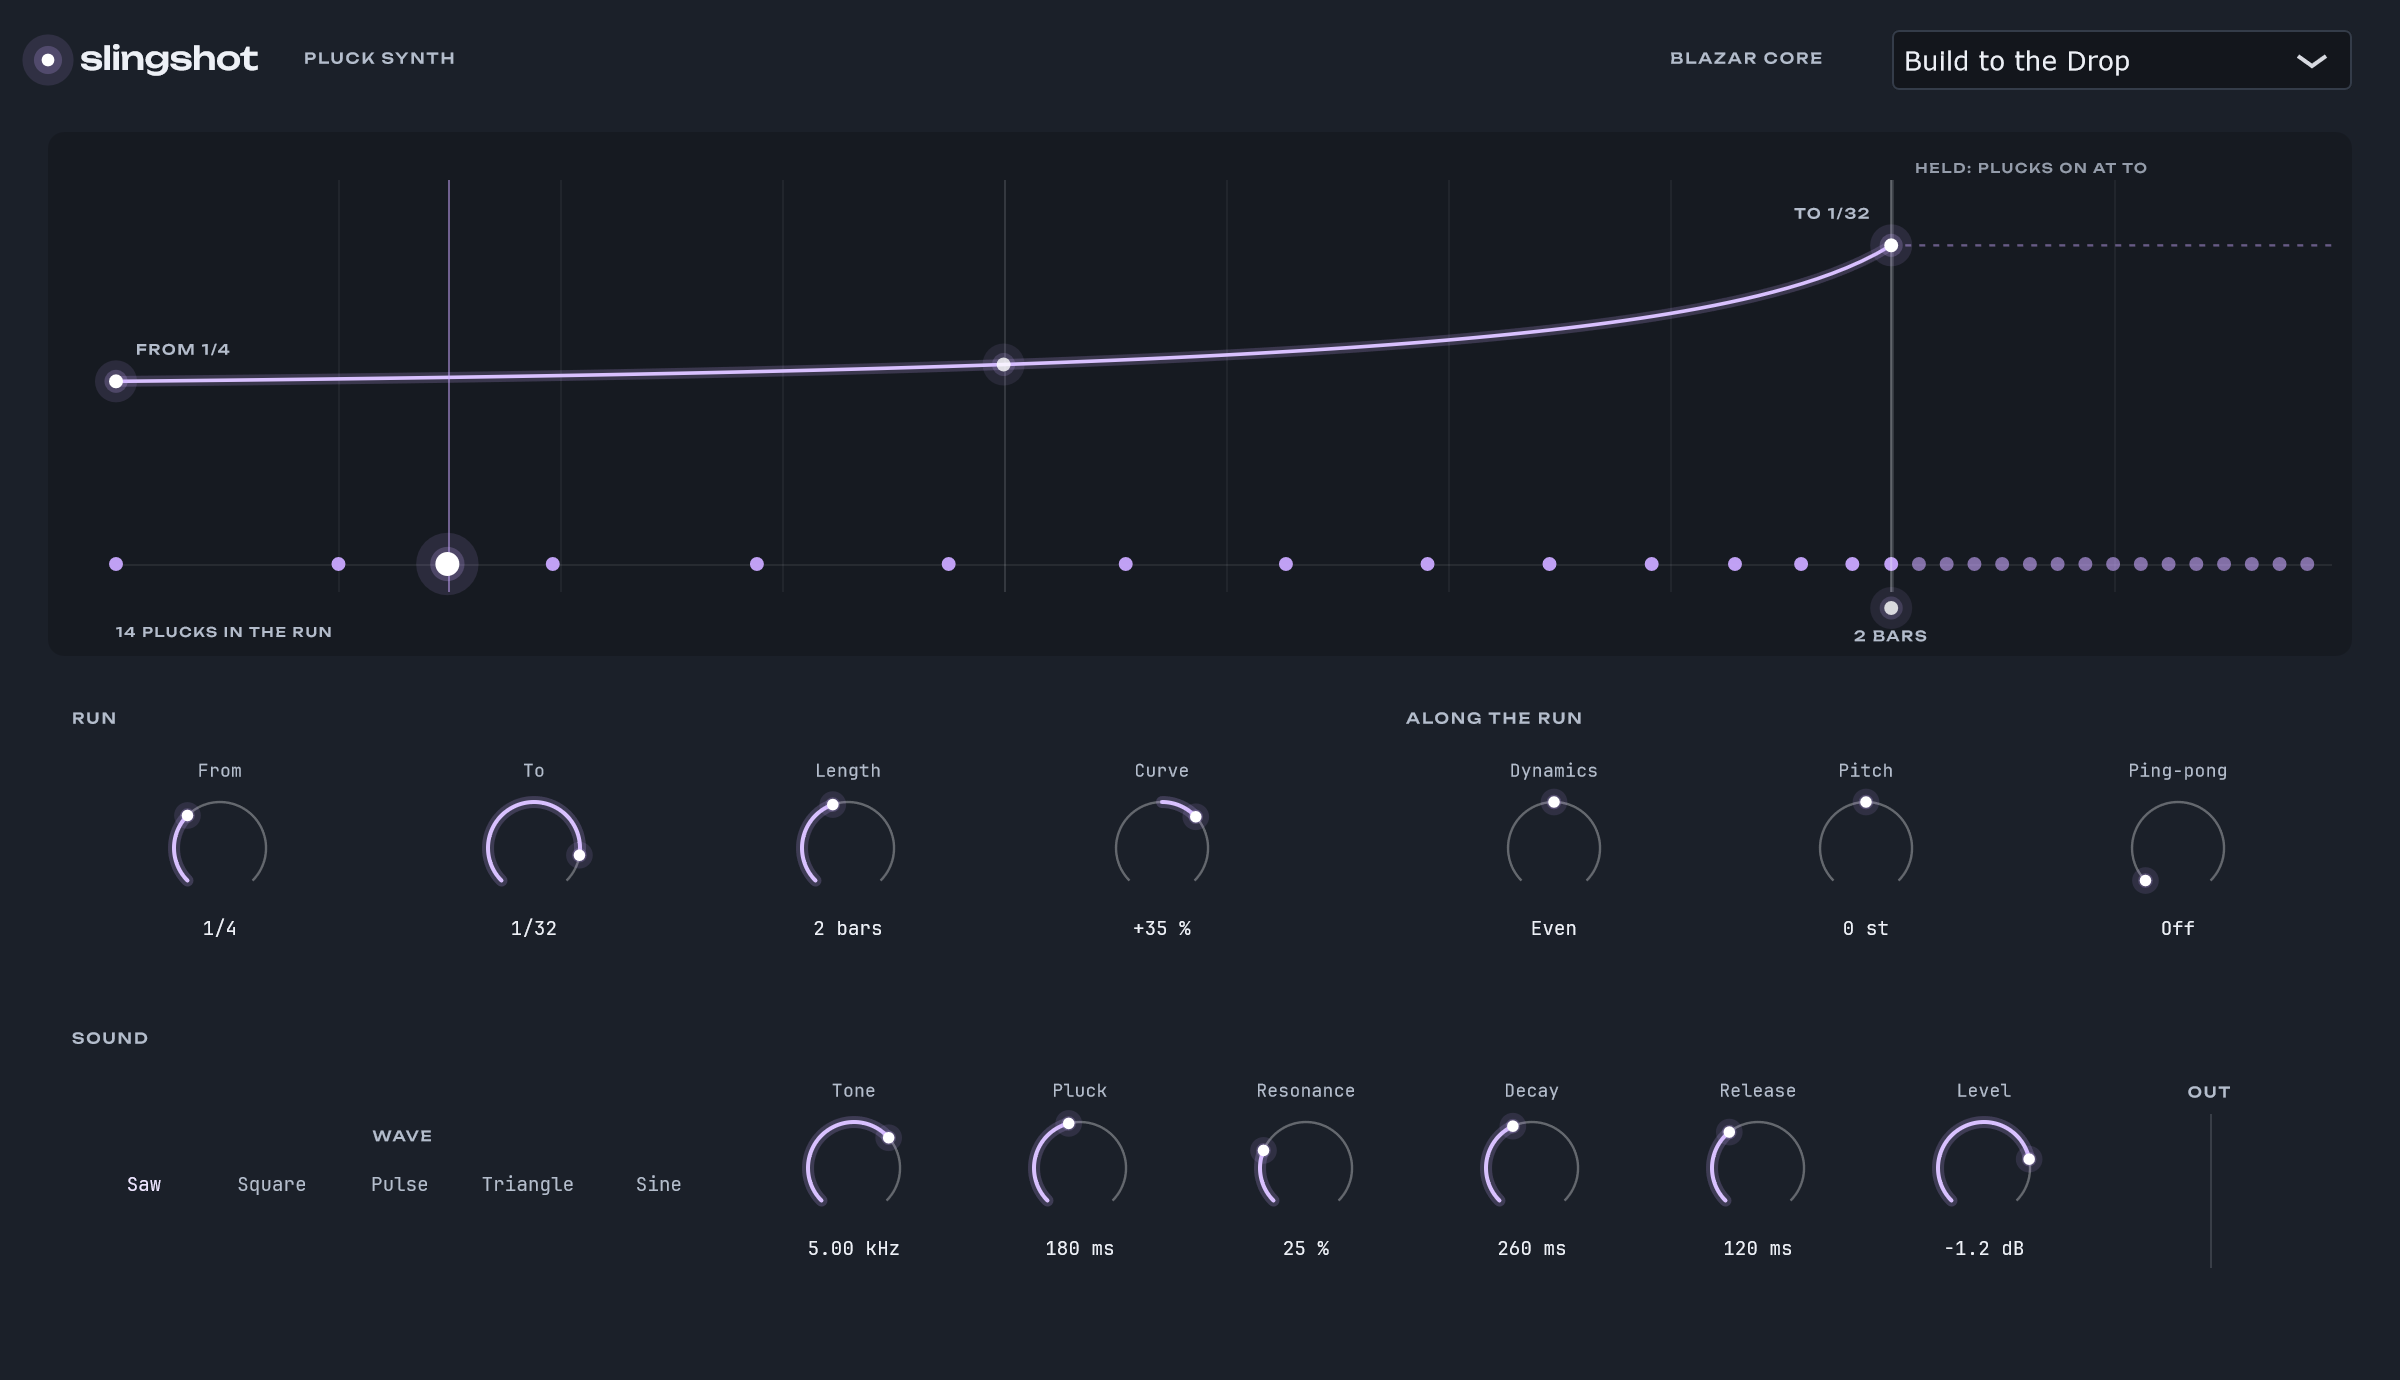
Slingshot

The pluck synth: each note a run of plucks speeding up or slowing down smoothly, its last on the beat.

Asterism’s window

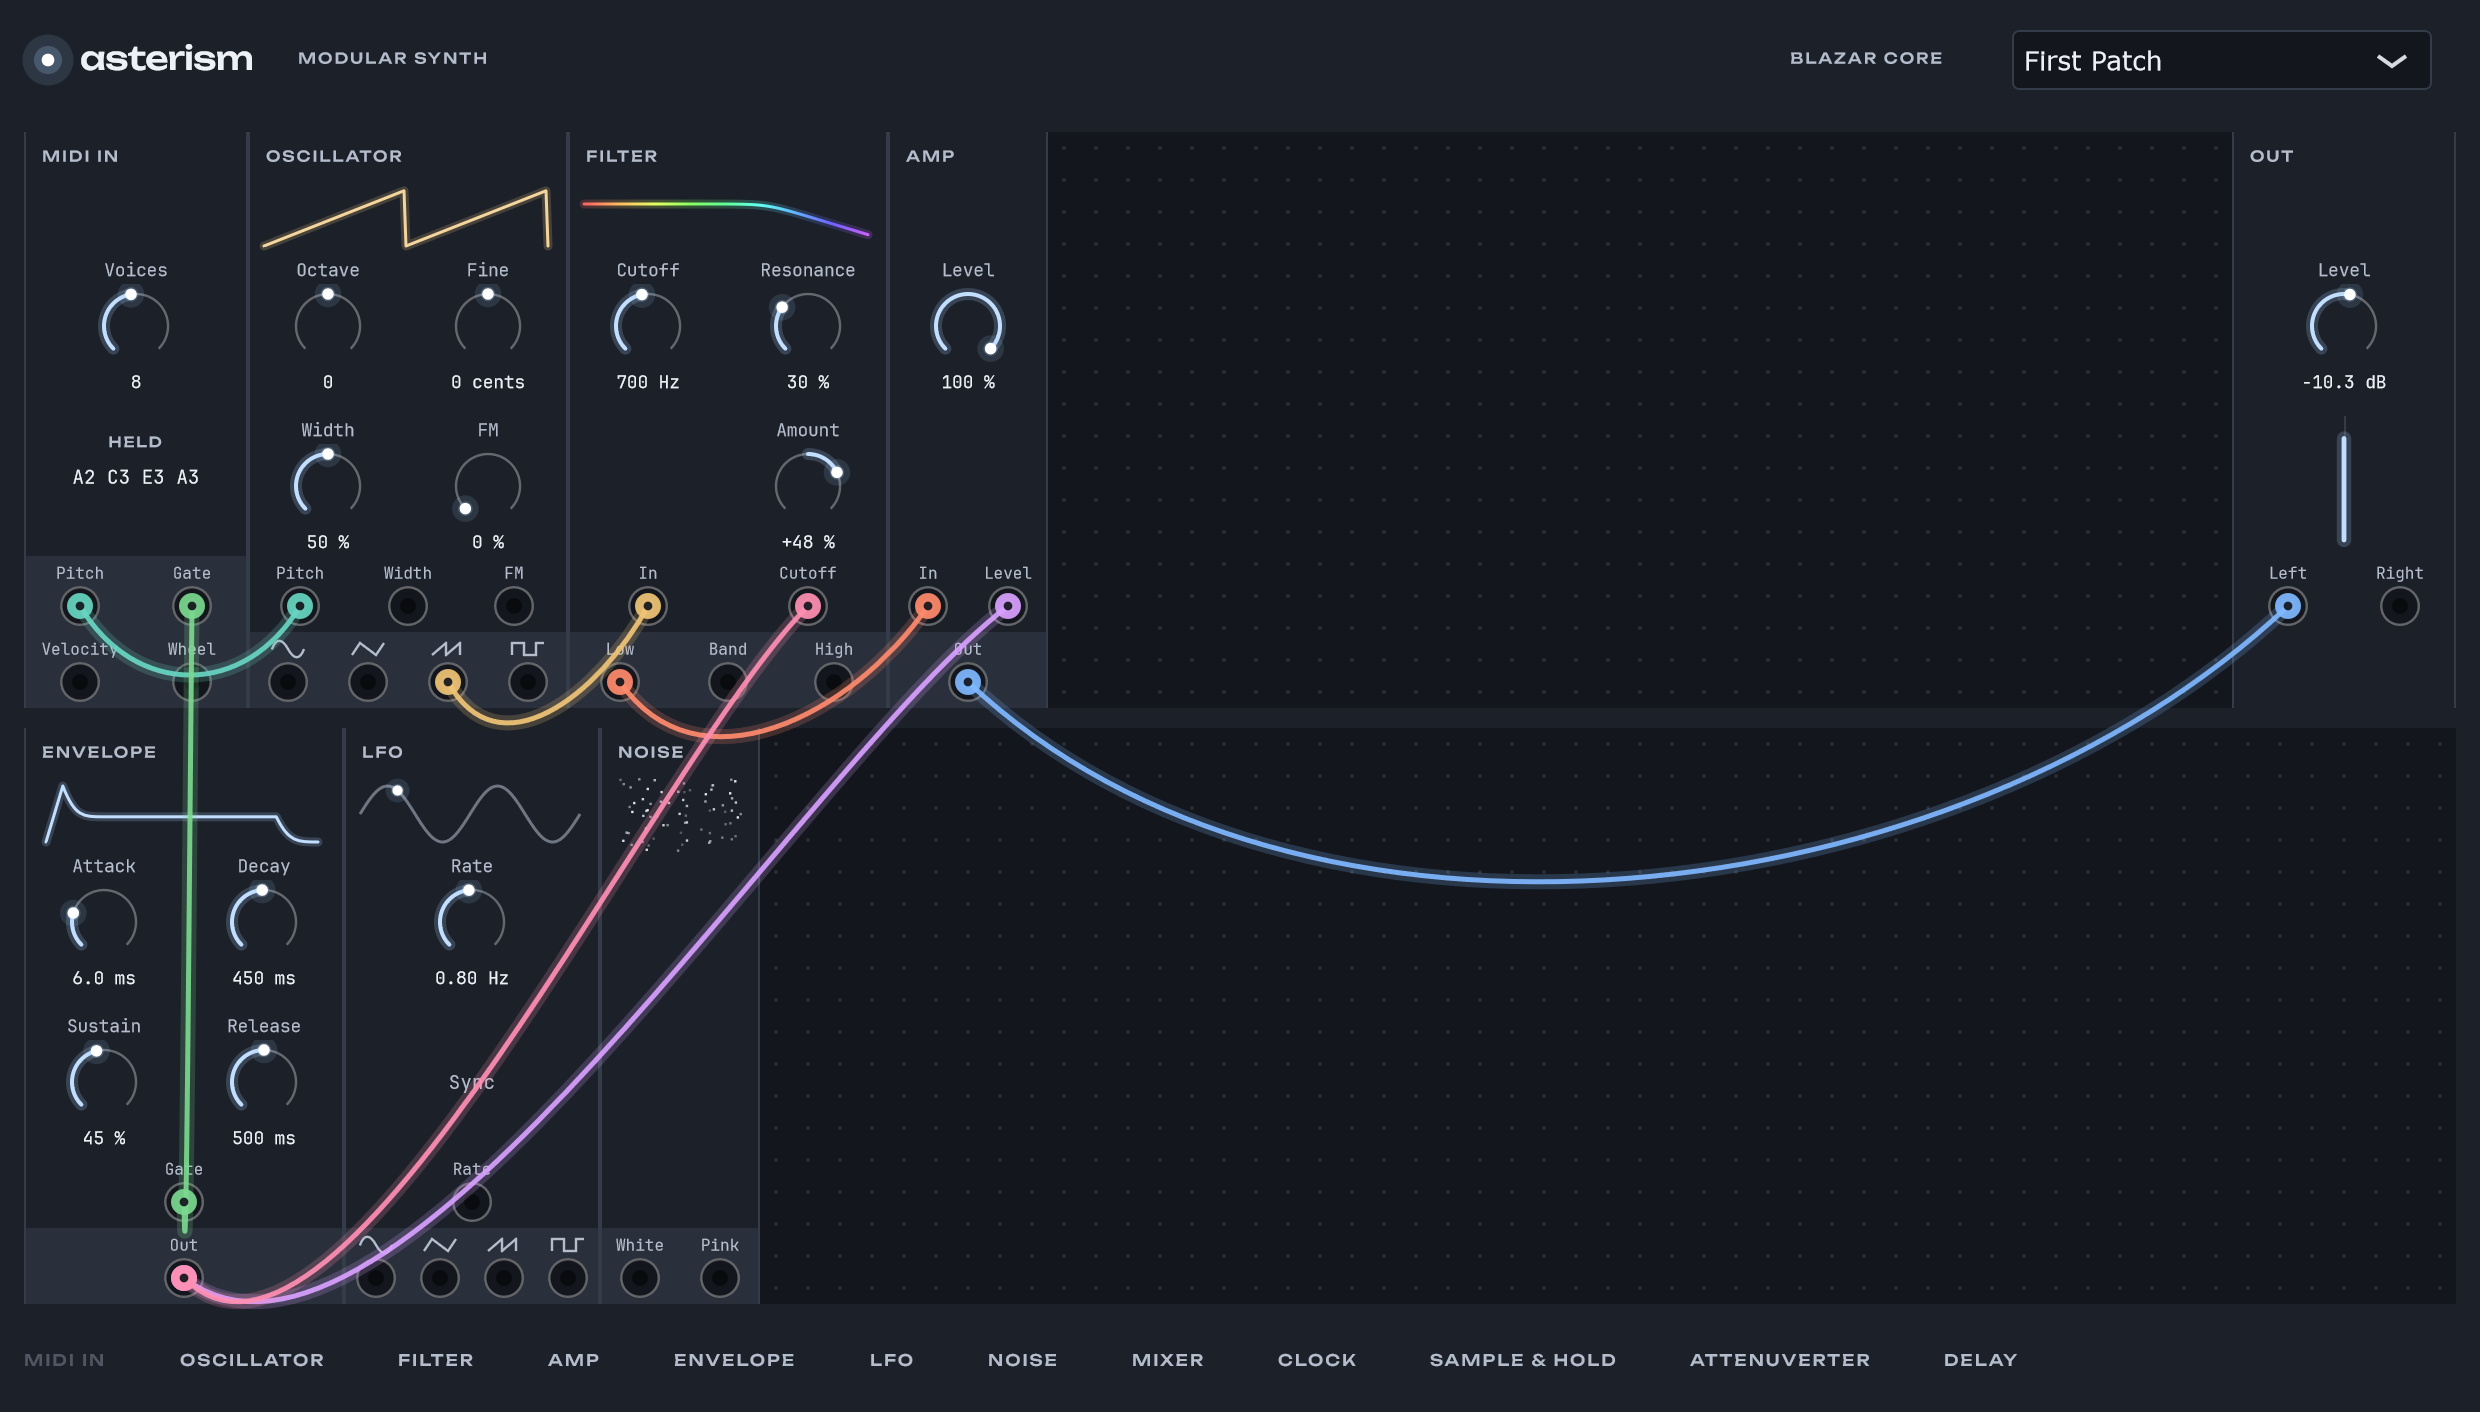
Asterism

The modular synth: modules in a rack joined by cables, playing one note at a time or full chords.

Picture and agents

Score to picture. Hand off the busywork.

The picture keeps out of your way, and an agent does the clicking while you write.

A picture window that gets out of your way

Drop a video on the arrangement and its picture opens in its own window, showing the frame at the playhead with the timecode and bar under it. Put the window on a second screen and it opens there next time.

On one screen, when the pointer heads onto the picture, the window glides off to the corner of Blazar Core furthest from the pointer. Head for Save in the top left and the picture moves to the bottom right.

Its title bar and edges still move and size it, and right after you move it, it stays put.

Frames are exact, and picture and sound line up to the sample.

In the manual

Tell your agent what to do. Keep writing.

Press Ctrl+Space and Jet, the agent inside Blazar Core, rises above the transport, or opens in a window of its own anywhere on your screens. Or connect your own, Claude Code, Codex, Gemini CLI or Claude Desktop, from the agents button at the bottom right.

The agent reads the whole session: tracks, plugins, containers, notes, tempo changes and hit points. Changes land in the open session while you watch, and each one is a single undo step.

  • “Double the cello line an octave up on a new track.”
  • “Make the accents in the horns marcato.”
  • “Put a limiter on the master.”
  • “Cut bars 17 to 20.”
  • “Export the stems.”

Jet runs on Claude Code, Codex or Gemini CLI if you have one, or on an API key you paste in. Speech-to-text apps type into its prompt, so you can say what you want.

In the manual
Delivering

Hand over every file from one session.

A game’s loops with the intros, outros and one-shots around them, and a video of a passage to share.

Lay out a game’s music in loops and one-shots

Switch the locator row to Game Loop and lay out the parts a game plays: the loops it repeats, each with an intro and an outro when it needs them, and one-shots such as Battle Lost.

Click + beside a part to add an intro, an outro, a loop or a one-shot right there, or drag across the row to draw a loop. Click a part to put the locators on it and hear it repeat while you write. Double-click it to name it.

Export writes each part as its own file: a loop as its intro, the loop and its outro, rendered as the game plays them, so the loop repeats seamlessly with its reverb tails carried round.

Untick Intro or Outro in Export when only the loops are needed.

In the manual

Turn a passage into a video

Set the locators around a passage and choose Export Video... in the Project menu. Flare draws your notes in one of five styles, Constellation, Flyby, Orbit, Aurora or Accretion, each note in its track’s color.

Pick 9:16 for Reels, TikTok and Shorts, 1:1 for feeds or 16:9 for YouTube. Type a title and a line under it. The tempo comes from the session, and the key from Polaris when the guide track has chords.

The sound is your mix as you hear it, at -14 LUFS, the level streaming services play at. The file is an MP4 at 60 frames per second, ready to post.

Click Play to watch the passage as the video will show it before you export.

In the manual
Under the hood

Big templates, steady playback.

Your template loads once, every core works, spikes are absorbed, and what you are not using gives its memory and processor time back.

Load your template once

Satellite plays your instruments in a program of its own beside Blazar Core, much as Vienna Ensemble Pro does. Turn on Host instruments in Satellite in Settings > Plugins, and the open session’s instruments move there with their settings.

Open the next cue, and every instrument it shares with the last one is already loaded: the same plugin with the same settings comes straight back, and only what differs loads. Effects stay loaded between sessions too, so going from one cue of a large template to the next takes seconds instead of minutes.

If an instrument crashes, only Satellite closes. Your session keeps playing, Satellite starts again and opens every instrument with its settings, and the one that crashed is turned off on its track.

Satellite’s window lists what it holds, in use and kept loaded, with each instrument’s load. Choose Run in Satellite for an effect that crashes now and then or takes long to load.

In the manual

Playback that rides out CPU spikes

While the song plays, Slipstream renders the tracks that are only playing back a little ahead of the audio device, on CPU threads of their own. When a plugin spikes, that time ahead absorbs the spike, instead of the spike reaching your speakers as a dropout.

Tracks you play, record or monitor, and any track whose plugin window is open, stay in real time, so a knob you turn is heard at once. Faders, pan, mute, solo, sends and volume automation stay live on every track.

How far ahead adapts by itself: deeper after a close call, back again when things are calm.

In the manual

Graviton, an engine of its own

Blazar Core no longer runs on JUCE, the third-party framework many plugins and audio apps are built on. Since version 0.5.0 it runs on Graviton, written for Blazar Core alone: the layer under everything, from the audio devices and the plugin hosting to the windows and every pixel drawn in them.

A large template plays with less processor load. Plugins that fall silent rest until they’re needed again, and the Performance window shows which ones are working and which are resting.

Your sessions, settings and plugin states open exactly as before. Graviton reads and writes them byte for byte as the earlier versions did.

With no third-party framework underneath, a fix or a new feature in Blazar Core never waits on someone else’s release, on Windows or the Mac.

In the manual

Put the tracks you’re not using to sleep

Blazar Core notices instrument tracks you have left alone for ten minutes. A snowflake button appears in the top bar and gently pulses, offering to put them to sleep.

A sleeping track plays exactly as before from a recorded copy of its sound, while its instrument is unloaded and its effects pause. Their memory and processor time go to the tracks you’re working on.

Select a sleeping track and it wakes by itself, with its instrument loaded again as it was.

Blazar Core only ever offers. Nothing freezes by itself while you render, mix or open an effect.

In the manual
Every day

Comfortable for long sessions.

A look for day and night, and an honest count of where the hours went.

Nine looks, from cinema black to daylight

Settings > Appearance shows nine looks side by side, from the darkest to the brightest: Dark, Overcast, Graphite, Stone, Steel, Sage, Daylight, Ember and Neon. Click one, and all of Blazar Core takes it at once, while the session plays on.

Graphite, Stone and Steel are the grays of a studio’s mixing software: the tracks lie on a lighter gray than the panels around them. In Daylight and Sage, track colors, timecode and hit points take deeper shades so they still read on the light ground.

Blazar Core’s own effect windows follow the look, and Blazar Core keeps your choice for the next launch.

In the manual

See where your time went

Aevum, built into Blazar Core, keeps track of the time you spend on each session. There is nothing to start or stop.

It sorts the time by what you actually do: composing, arranging, recording, choosing sounds, sound design, mixing, mastering and listening back. Only time with your hands on the keys, the mouse or a MIDI keyboard counts.

See the total for the session, each day’s sittings, and the time per channel and per bar of the song.

The time is kept in the project folder and written every half minute, whether or not you save.

In the manual
Also in Blazar Core 0.5.7

And the things a DAW for deadlines needs.

Search Commands

Press Ctrl+K and type part of a command’s name to find it and run it, with its menu and keys beside it.

Presets and Reset in every plugin

Save presets of your own for any plugin, there in every project. Reset sets every control back to where it started.

Play an instrument from a guitar

Choose Guitar as a track’s MIDI input and play any instrument from your guitar, one note at a time, with slides played legato.

A narrow mixer

One button makes every channel slim, with its inserts’ power buttons, sends, pan and fader still in reach.

Track numbers

Each track’s number in its header and on its mixer channel, in the order they’re on screen.

Folders into folders

A folder track plays into another folder track, as bus tracks do.

Retrospective Record

Played something good without recording? Press Ctrl+Num * and what you just played lands on the armed track, right where you played it.

The History

Undo, Redo and History sit in the top bar. The History window lists your edits: go back to any of them, or undo one alone.

Note chase

A note already held where playback starts, or where the loop comes round, sounds there.

Sessions in tabs

Keep several sessions open, each in a tab in the title bar, and switch with Ctrl+Tab. The sessions you aren’t working in play nothing and keep their unsaved changes.

Luminosity

Pick a delivery target: Streaming, Apple Music, EBU R 128, ATSC A/85 or your own. Luminosity says in words where the cue stands and shows its loudness bar by bar.

Mix versions

Queue alternate mixes in the Export drawer, such as one without the vocals and one without the drums, and export them all in one go.

Export at another sample rate

Pick 44.1 to 192 kHz in the Export drawer, whatever rate the session runs at.

Bolide

A built-in percussion synth for kicks, toms, snares, hats, bells and hits, with a 16-step sequencer that follows the session.

Shape a whole container

Give a MIDI container fades, a level, dynamics and a transposition. Alt+D makes linked copies that change together.

Crossfades and audio edits

Crossfades take a length and a curve. The audio editor splits and glues, and every channel has a polarity key.

Free warp

Set warp markers and drag the audio onto the grid. The pitch stays.

One MIDI input per track

Set a track to hear one keyboard or controller alone.

The Performance window

Click the load meter to see the load over time, late blocks, each core’s share and the heaviest channels.

Your own shortcuts

Change the keys of any command in Settings > Keyboard Shortcuts.

Count-in

One or two bars before a take, from a standstill. Notes played into it are kept as a pickup.

Bar starts, caught

A click on the ruler lands on the bar’s start, and with the magnet on the playhead follows the grid everywhere.

Hit points and timecode

A hit lane above the bars holds the moments in the picture. The transport counts down to the next one.

Loop recording and comping

Every pass becomes a take. Click the best part of each, and the parts play as one comp.

Melodyne in the arrangement

ARA 2 plugins play the track’s clips themselves and follow every move, cut and undo.

Patch delays, measured

How late each Kontakt patch plays is measured once, silently, and made up for on its track.

Stems with their reverb

The mixdown and any stems in one pass, each with its own share of the send and return effects.

Projects from other DAWs

Open a DAWproject from Bitwig, Studio One or Cubase: its tracks and folders, notes, audio, sends and VST3 plugins come in.

Templates and track presets

Save a track with its instrument, effects and mixer settings, or a whole setup as a template.

Versions and autosave

Ctrl+Alt+S saves the next numbered version. Autosave keeps the 10 newest copies.

Automation

Touch, Latch and Write for volume, pan, mute, sends and any plugin control. The Morph orb records its path too.

A touch surface

On a touch screen: keys, wheels, articulations, eight faders at a time, an XY pad for Quantum Entanglement and every shortcut as a pad, without ever taking focus.

Latency compensation

Tracks, folder buses, sends and master inserts all meet in time, in playback and in exports.

One hall for the orchestra

Stage seats every section in one stereo concert hall. Each stem keeps its own hall tail.

One instrument, many tracks

MIDI tracks share one Kontakt instance, each on its own MIDI channel and stereo return, with its own Prism map.

The selected track, at the left

The inspector holds the selected track’s routing, inserts, sends and fader, with the mixer closed.

See where each channel plays

An arrow under each channel’s name, and the selected channel’s path through its folders outlined up to the master.

Outboard gear and hardware synths

Hardware effects in insert slots and external instruments on tracks, their round trip measured and made up for.

Updates from inside the app

A new version downloads while you work, installs, and opens your session again.

CLAP plugins

CLAP instruments and effects load beside VST3. A plugin that comes in both is listed once, as the one you choose.
From the early access

What composers say.

“It is a potentially groundbreaking DAW, even though it is still nowhere near version 1.0! You can feel it’s been created from scratch as a modern project for today’s music production world. I’m happy to be able to contribute in some way to its development.”
Stefano GalanteProducer
“As a hobbyist composer, Blazar Core gives me everything I need in a sleek context-sensitive interface, with new features arriving almost every other week. That moment when you realise you can use the guitar-to-MIDI feature with a microphone… and suddenly you’re singing a legato cello line.”
Dave CushingComposer, mostly cinematic
“There’s a lot here for creating traditional cues, and plenty for those, like myself, of a more experimental bent. Workflow tweaks like Event Horizon, the circular menus and persistent instruments and effects across projects via Satellite simply can’t be beat. The updates are always meaningful and the update pace is incredible.”
GeorgeComposer
“With its user-friendly interface and quick shortcuts, it saves a lot of time, allowing me to stay focused directly on the composition. It’s probably one of the best-optimized DAW for working with multiple audio sources.”
Peter A aka Instrumental CoreMusic producer & Sound Designer
“Thank you so, so much for listening to your users and making their wishes come true!”
GadesComposer
The free trial

Everything works for 30 days of use.

Try your libraries, your template, your workflow, and keep what you make: saving never stops. When you are ready, buy a key and enter it in the app. Nothing to reinstall.